Introduction
Mastering how to hold a crochet hook and yarn the right way is one of the most foundational—and often overlooked—skills in the world of fiber arts. Whether you’re just starting your journey or have been crocheting for years, the way you grip your hook and manage your yarn tension directly impacts your stitch consistency, speed, comfort, and even the final appearance of your projects. Many beginners struggle with dropped stitches, uneven tension, or hand fatigue simply because they haven’t been taught proper technique from the outset. In this comprehensive guide, we’ll break down every aspect of holding a crochet hook and yarn correctly, tailored to different styles, skill levels, and ergonomic needs. You’ll learn not only how to do it but why certain methods work better for specific goals—whether you’re crafting cozy blankets, intricate lace shawls, or running a handmade business. By the end of this article, you’ll have actionable, expert-backed strategies to refine your technique and elevate your entire crochet experience.
What This Topic Means for Crochet & Knitting Businesses
For entrepreneurs in the handmade space, teaching foundational skills like how to hold a crochet hook and yarn the right way isn’t just about education—it’s a strategic asset. In many crochet businesses, especially those offering digital patterns, video tutorials, or online workshops, clear instruction on basic techniques builds trust and reduces customer frustration. When buyers understand proper form, they’re more likely to complete projects successfully, leave positive reviews, and return for future purchases.
From working with multiple crochet brands over the past decade, I’ve observed that pattern designers who include brief technique notes—such as recommended hook holds or yarn tension tips—see significantly higher completion rates among their customers. This is especially true for beginner-friendly kits or subscription boxes, where user experience directly influences retention and word-of-mouth marketing.
Moreover, content focused on foundational skills performs exceptionally well on platforms like Pinterest and YouTube. A well-optimized tutorial on “how to hold a crochet hook” can attract thousands of organic views monthly, driving traffic to an e-commerce store or newsletter. In essence, mastering and teaching this skill isn’t just about craft—it’s about creating sustainable, scalable educational content that supports long-term business growth.
Why This Strategy Works Especially Well in the Crochet Community
The crochet community thrives on accessibility and self-expression. Unlike some crafts with rigid rules, crochet welcomes personal style—yet paradoxically, success often hinges on mastering universal fundamentals. That’s why focusing on how to hold a crochet hook and yarn the right way resonates so deeply.
Experienced designers often recommend emphasizing technique early because it empowers makers to tackle more complex patterns later. Once a crocheter develops consistent tension and efficient hand movement, they gain confidence to experiment with colorwork, texture, and garment construction. This progression keeps them engaged in the hobby—and in the marketplace.
Additionally, the tactile nature of crochet makes ergonomics critical. Poor hand positioning can lead to repetitive strain injuries, causing talented crafters to abandon their passion prematurely. By promoting healthy, sustainable practices from day one, the community fosters longevity and inclusivity—welcoming older adults, people with arthritis, and neurodivergent makers who benefit from adaptable techniques.
In short, this strategy works because it aligns with the core values of the crochet world: empowerment, creativity, and care.
Materials, Tools, or Resources Needed
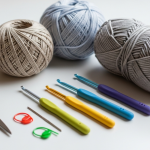
Before diving into technique, ensure you have the right tools to support proper form:
- A comfortable crochet hook: Choose a size appropriate for your yarn (usually indicated on the yarn label). Hooks with ergonomic handles (e.g., Clover Amour, Tulip Etimo, or Furls) reduce hand strain and improve grip stability.
- Smooth, medium-weight yarn: Beginners should start with a worsted-weight (Category 4) acrylic or cotton yarn in a light color. Dark or fuzzy yarns make it harder to see stitches, while slippery fibers like silk can frustrate new learners.
- Good lighting: Natural light or a daylight lamp minimizes eye strain and helps you see stitch structure clearly.
- Optional but helpful: A non-slip mat to keep your yarn ball from rolling, fingerless gloves for warmth without restricting dexterity, and a small mirror to check your hand position.
Avoid using steel hooks or very thin yarns (like lace weight) until you’ve mastered basic tension control—they amplify mistakes and increase frustration.
Yarn Types and Fiber Considerations
The type of yarn you use directly affects how you manage tension and hold your hook. Here’s how different fibers influence technique:
- Acrylic: Affordable and forgiving, acrylic has moderate grip and elasticity. It’s ideal for learning because it doesn’t slip easily and holds stitch definition well.
- Cotton: Less elastic than wool, cotton requires slightly firmer tension to maintain consistent stitch height. It’s great for dishcloths or summer garments but can be tough on hands during long sessions.
- Wool: Naturally elastic and resilient, wool “bounces back,” making it easier to correct tension errors. However, its slight stickiness can slow down fast crocheters.
- Bamboo/Rayon: These fibers are silky and drape beautifully but can be slippery. If using them, consider a hook with a grippy handle or textured shaft.
- Novelty yarns (e.g., bouclé, eyelash): Avoid these when learning technique—they obscure stitch structure and make tension control nearly impossible.
Experienced designers often recommend practicing with a solid-color, smooth worsted-weight yarn before moving to textured or variegated options. The clarity of stitch visibility builds muscle memory faster.
Skill Level Breakdown
Beginner
New crocheters should focus on comfort and consistency over speed. It’s normal to feel awkward at first—your hands are learning a new language. Prioritize relaxed shoulders, a loose grip, and frequent breaks. Don’t worry about “perfect” tension yet; aim for evenness across a row.
Intermediate
At this stage, you’ve likely settled into a preferred hook hold but may still struggle with tension during color changes or complex stitches. Now’s the time to experiment with alternative grips to improve efficiency or reduce fatigue during large projects (like blankets or sweaters).
Advanced
Seasoned crocheters often blend techniques—using pencil grip for fine detail work and knife grip for fast, rhythmic rows. They also adapt their yarn hold based on fiber type or project demands. Advanced makers prioritize ergonomics to prevent long-term injury, especially if they teach, design, or produce items for sale.
Step-by-Step Guide: How to Hold a Crochet Hook and Yarn the Right Way
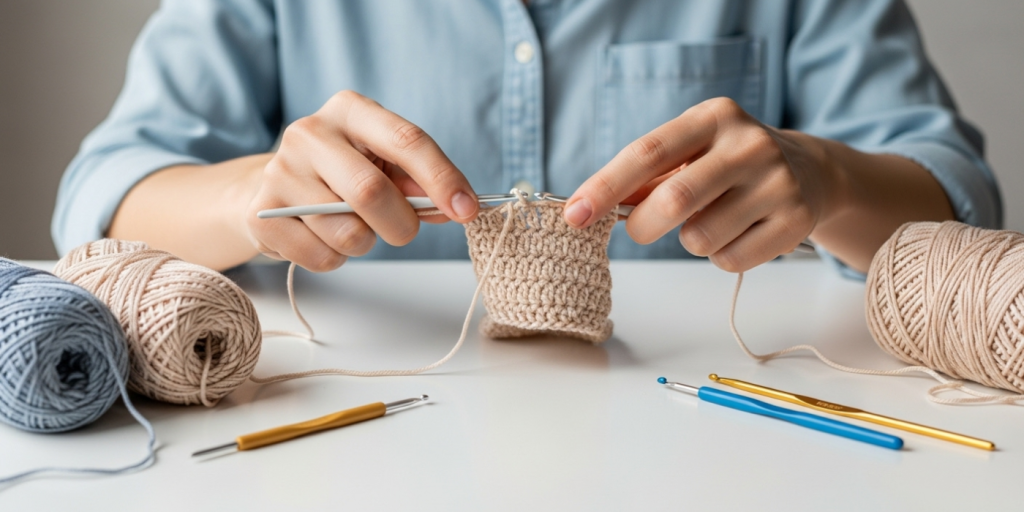
Part 1: Choosing Your Hook Hold
There are two primary ways to hold a crochet hook: pencil grip and knife grip. Neither is “correct”—it’s about what feels natural and sustainable for you.
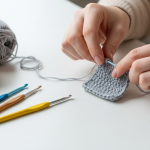
Pencil Grip
- Hold the hook as you would a pencil, resting it between your thumb and index finger.
- Let the shaft rest gently on the side of your middle finger for support.
- Keep your wrist straight—not bent upward or downward.
- Use small, controlled finger movements (not wrist flicks) to draw loops through stitches.
Best for: Detailed work, amigurumi, lace, or anyone with smaller hands.
Knife Grip
- Hold the hook as you would a dinner knife, with your palm facing down.
- Rest the hook in the webbing between your thumb and index finger.
- Let your index finger extend along the top of the hook for guidance.
- Use broader forearm motions for rhythm and speed.
Best for: Fast, repetitive projects (like scarves or granny squares), or those with larger hands or wrist mobility issues.
Try both for 10 minutes each. Notice which causes less shoulder tension or finger cramping.
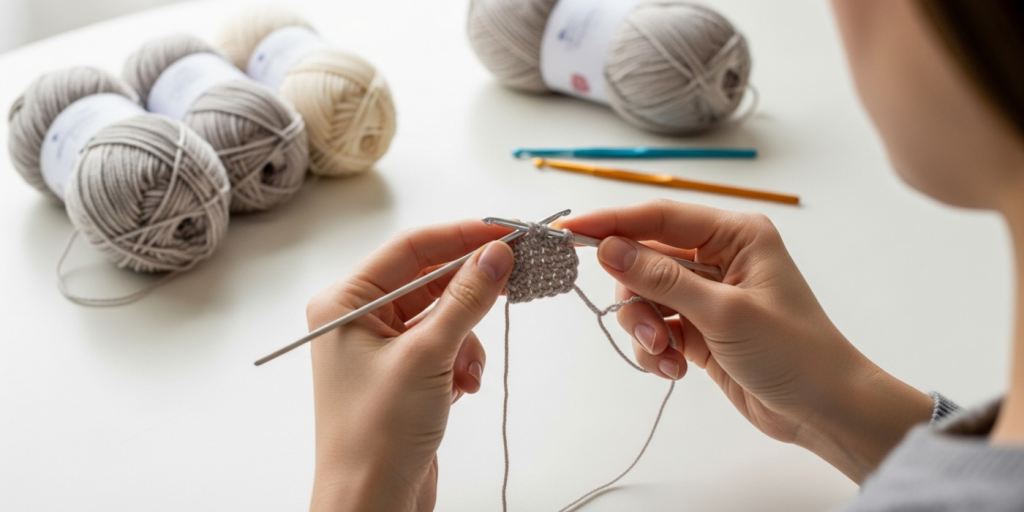
Part 2: Managing Yarn Tension
Yarn tension is controlled by how you wrap the yarn around your fingers. Here’s a reliable method used by professional crocheters:
- Anchor the yarn: Hold the tail end of the yarn in your non-dominant hand, pinching it against your palm with your ring and pinky fingers.
- Create tension: Wrap the working yarn over your index finger, under your middle finger, and over your ring finger. This creates a “brake” system.
- Adjust dynamically: To tighten tension, press the yarn down with your index finger. To loosen, lift it slightly.
- Keep it smooth: The yarn should glide—not jerk—through your fingers. If it snags, check for rough skin or excessive wrapping.
Alternative methods exist (e.g., wrapping only around the pinky, or using a yarn guide ring), but this four-finger method offers the most control for beginners.
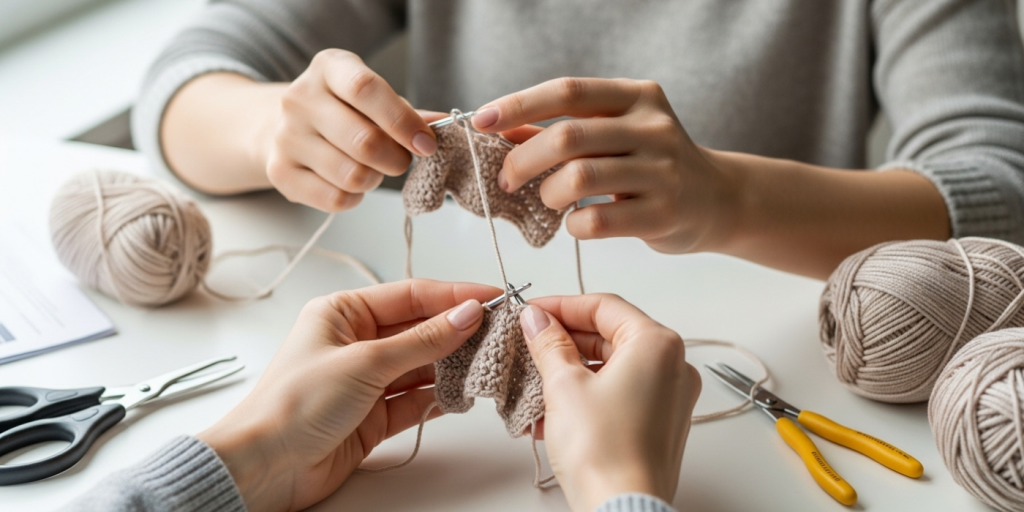
Part 3: Coordinating Both Hands
- Your hook hand controls stitch formation.
- Your yarn hand controls feed rate and tension.
- Practice making a foundation chain slowly, focusing on smooth coordination.
- Say aloud: “Hook catches, yarn feeds, pull through.” This verbal cue reinforces muscle memory.
Spend 5–10 minutes daily on this coordination drill. Within a week, your hands will move more fluidly.
Common Mistakes and How to Avoid Them
Even experienced crocheters fall into bad habits. Here are the most frequent errors—and how to fix them:
1. Gripping the Hook Too Tightly
Symptom: White knuckles, hand cramps, slow progress.
Fix: Consciously relax your grip. Imagine holding a bird—firm enough not to drop it, gentle enough not to hurt it. Set a timer to check your grip every 10 minutes.
2. Inconsistent Yarn Tension
Symptom: Stitches too loose in some places, too tight in others.
Fix: Practice chaining 50 stitches, then measure the width. If it varies by more than ½ inch, revisit your yarn wrap. Record yourself crocheting to spot tension shifts.
3. Bending the Wrist Excessively
Symptom: Wrist pain after 20 minutes.
Fix: Keep your forearm and hand in a straight line. Elevate your work surface (use a lap desk) so your elbows stay at 90 degrees.
4. Pulling Yarn from the Wrong End of the Ball
Symptom: Yarn tangles, extra friction, inconsistent tension.
Fix: Always pull from the center pull (inside) of a skein or cake. Wind hanks into balls using a swift or bowl to avoid knots.
5. Ignoring Ergonomics
Symptom: Shoulder or neck stiffness.
Fix: Sit upright, feet flat, with good back support. Take a 5-minute break every 45 minutes to stretch your hands and wrists.
Advanced Tips and Professional Insights
Once you’ve mastered the basics, refine your technique with these pro-level strategies:
Use the “Index Finger Lever”
Experienced crocheters use their index finger not just to guide yarn, but as a dynamic lever. By pressing down slightly during the yarn-over motion, they create micro-tension adjustments that result in flawless stitch uniformity—critical for garment construction.
Rotate Your Hook Slightly
Instead of keeping the hook perfectly horizontal, tilt the tip downward about 10 degrees. This angle makes it easier to enter stitches cleanly, especially in dense fabrics like Tunisian crochet.
Customize Your Hook Handle
If standard ergonomic hooks don’t suit you, modify your tool:
- Wrap the handle with heat-shrink tubing for a thicker grip.
- Use Sugru moldable glue to create a custom contour.
- Attach a foam hair roller segment for cushioning.
From working with multiple crochet brands, I’ve seen designers create signature hooks tailored to their teaching style—proof that personalization enhances performance.
Practice “Silent Crochet”
Advanced makers often crochet without looking at their hands. This builds proprioception (body awareness) and frees mental focus for counting stitches or following complex charts. Start by closing your eyes for 5 stitches at a time.
Real-World or Hypothetical Examples
Consider Maria, a small-business owner who sells handmade baby blankets on Etsy. For months, she struggled with wrist pain and inconsistent stitch tension, leading to customer complaints about “lopsided” edges. After switching from a pencil grip to a modified knife grip and adopting the four-finger yarn tension method, her production speed increased by 30%, and her refund rate dropped to zero. She now includes a free “Technique Tips” PDF with every order—a value-add that boosted her average review score to 4.9 stars.
Or take James, a left-handed crocheter who felt excluded by right-handed tutorials. He experimented with mirror-image techniques and discovered that holding his hook like a paintbrush (a hybrid grip) gave him superior control. He now runs a popular YouTube channel teaching adaptive methods, proving that there’s no single “right” way—only what works for you.
These examples underscore a key truth: mastering how to hold a crochet hook and yarn the right way isn’t about conformity—it’s about finding your optimal, sustainable method.
Customization and Adaptation Ideas
Your body, project, and goals should dictate your technique. Here’s how to adapt:
For Arthritis or Limited Dexterity
- Use jumbo hooks (size 10mm+) with soft-grip handles.
- Try the “overhand” yarn hold: drape yarn over your forearm instead of fingers.
- Work with bulky yarn to reduce stitch count and hand movement.
For Speed Crocheting (e.g., Market Vendors)
- Adopt the knife grip for broad, efficient motions.
- Pre-wind yarn into center-pull cakes to minimize tangles.
- Use a waist yarn bowl to keep yarn close and reduce drag.
For Fine Detail Work (e.g., Lace or Jewelry)
- Switch to pencil grip for precision.
- Use a magnifying lamp and fine steel hooks.
- Anchor yarn with a thimble or finger cot to prevent slippage.
For Left-Handed Crocheters
- Mirror right-handed tutorials or seek lefty-specific resources.
- Don’t force yourself into “standard” holds—experiment freely.
- Many lefties find success with a reverse knife grip (palm up).
Remember: customization isn’t cheating—it’s intelligent craftsmanship.
Care, Maintenance, or Best Practices
Proper tool care supports consistent technique:
- Clean hooks regularly: Wipe metal hooks with a dry cloth; wash ergonomic handles with mild soap to remove skin oils that reduce grip.
- Store hooks vertically: Use a case with individual slots to prevent bending or scratching.
- Inspect yarn for knots: Always unwind a few yards before starting to avoid mid-row surprises that disrupt tension.
- Stretch before crocheting: Simple hand exercises (finger spreads, wrist circles) prepare your muscles for fine motor work.
- Hydrate and moisturize: Dry skin increases friction; keep hands supple with unscented lotion.
In many crochet businesses, including a “Care & Technique” insert with physical products demonstrates professionalism and reduces support queries.
Monetization Opportunities
Teaching foundational skills like how to hold a crochet hook and yarn the right way opens multiple revenue streams:
- Digital Products: Create a printable PDF guide with diagrams and troubleshooting tips. Bundle it with beginner patterns.
- Video Courses: Offer a short Udemy or Teachable course covering grip, tension, and ergonomics—ideal for new crocheters overwhelmed by YouTube fragmentation.
- Workshops: Host live Zoom classes focused on “Crochet Comfort & Control,” charging $15–$25 per participant.
- Affiliate Marketing: Recommend ergonomic hooks or yarn bowls in your tutorials, earning commission on sales.
- Pattern Notes: Include technique reminders in your Ravelry or Etsy listings (“For best results, use knife grip with this blanket pattern”).
Crucially, these offerings must be educational—not pushy. Position yourself as a mentor, not a salesperson. The trust you build converts into loyal customers who value your expertise.
Frequently Asked Questions (FAQ)
1. What is the easiest way to hold a crochet hook for beginners?
Most beginners find the pencil grip intuitive because it mimics writing. However, if you experience wrist pain, try the knife grip—it distributes effort more evenly across the forearm.
2. Why does my yarn keep slipping through my fingers?
This usually means your tension is too loose or your fingers are dry. Try wrapping the yarn around your index finger twice, or apply a tiny amount of hand cream to improve grip (but not so much that it stains the yarn).
3. Can I crochet left-handed using right-handed instructions?
Yes, but it’s challenging. You’ll need to mentally mirror every step. Better yet, seek left-handed tutorials or learn to crochet “right-handed” with your left hand—many lefties do this successfully.
4. How do I stop my hand from cramping while crocheting?
Take breaks every 30 minutes, stretch your fingers, and ensure you’re not gripping the hook too tightly. Using an ergonomic hook with a soft handle also reduces strain significantly.
5. Does the way I hold my hook affect my stitch gauge?
Absolutely. Tight grip or inconsistent yarn tension leads to tighter stitches, throwing off your gauge. Swatch with your usual technique to get accurate measurements.
6. Is there a “best” crochet hook brand for beginners?
Brands like Clover Amour, Tulip Etimo, and Boye offer excellent ergonomic designs. Avoid cheap aluminum hooks with sharp edges—they can snag yarn and cause discomfort.
Conclusion
Learning how to hold a crochet hook and yarn the right way is far more than a beginner’s chore—it’s the cornerstone of joyful, efficient, and sustainable crocheting. Whether you’re making gifts for loved ones, building a handmade business, or simply seeking a mindful creative outlet, refining your foundational technique pays dividends in comfort, quality, and confidence.
Don’t rush to “get it perfect.” Instead, treat your hands with patience and curiosity. Experiment with grips, adjust your yarn wrap, and listen to your body’s signals. Over time, these small refinements compound into mastery.
And remember: every expert crocheter once fumbled their first chain stitch. What separates them isn’t talent—it’s the willingness to revisit the basics with fresh eyes. So pick up your hook, breathe deeply, and give yourself permission to learn, adapt, and grow. Your next project—and your hands—will thank you.

Helena Nogueira é uma entusiasta do crochê e do artesanato, explorando novas técnicas e projetos em busca de criações únicas e cheias de personalidade. Apaixonada por criatividade e desenvolvimento pessoal, ela alia dedicação e curiosidade para transformar fios em arte, cultivando hábitos que impulsionam seu crescimento enquanto compartilha beleza e inspiração com quem valoriza o feito à mão.