Introduction
The chain stitch is the very foundation of crochet—the first stitch every beginner learns and the essential building block for nearly every project that follows. Whether you’re crafting a cozy blanket, a delicate lace shawl, or a structured market bag, mastering how to crochet a simple chain stitch step by step is non-negotiable. Despite its apparent simplicity, the chain stitch holds immense power: it sets your gauge, determines your starting width, and often forms the backbone of more complex patterns. Yet, many new crocheters rush through this foundational technique, only to encounter frustration later when their edges curl, tension wobbles, or counts go awry.
In this comprehensive guide, we’ll walk through every nuance of the chain stitch—not just the mechanics, but the why behind each motion, the subtle adjustments that elevate consistency, and how this humble stitch connects to broader success in both personal projects and handmade businesses. From selecting the right hook and yarn to avoiding common pitfalls that derail even experienced crafters, you’ll gain actionable insights rooted in real-world practice. Whether you’re sitting down with yarn for the first time or refining your technique after years of stitching, this deep dive into the chain stitch will transform your approach from tentative to confident.
What This Topic Means for Crochet & Knitting Businesses
For handmade entrepreneurs—whether selling finished goods, digital patterns, or teaching workshops—understanding the chain stitch isn’t just about technique; it’s about customer experience and product integrity. In many crochet businesses, the quality of the foundation chain directly impacts the perceived value of the final item. A sloppy, uneven chain can make an otherwise beautifully stitched garment look amateurish, leading to negative reviews or returns. Conversely, a clean, consistent chain signals professionalism and attention to detail—traits that justify premium pricing.
Moreover, digital pattern designers rely heavily on accurate chain instructions. If a pattern begins with “Ch 120,” buyers expect that number to yield the correct width. Misjudging chain tension or failing to account for yarn behavior can result in sizing errors across entire collections, damaging brand credibility. From working with multiple crochet brands over the past decade, I’ve seen how foundational skills like chaining become silent ambassadors for a business’s standards. Even in knitting-focused shops that offer crochet accessories (like button bands or edgings), the ability to execute a precise chain stitch ensures seamless integration between techniques.
Educational content centered on the chain stitch also performs exceptionally well online. Tutorials, reels, and blog posts addressing common chaining struggles attract high-engagement traffic—especially from beginners actively seeking solutions. This makes “how to crochet a simple chain stitch step by step” not just a skill, but a strategic content pillar for audience growth and trust-building.
Why This Strategy Works Especially Well in the Crochet Community
The crochet community thrives on accessibility and incremental mastery. Unlike some crafts that demand expensive tools or complex setups, crochet begins with a hook, yarn, and one fundamental motion: the chain. This low barrier to entry explains why millions turn to crochet for stress relief, creative expression, or supplemental income. But it also means that early frustrations—like tangled chains or inconsistent tension—can quickly discourage newcomers.
That’s where a detailed, empathetic guide to the chain stitch becomes transformative. Experienced designers often recommend dedicating an entire practice session just to chaining. Why? Because repetition builds muscle memory, and confidence in the chain stitch unlocks willingness to tackle more advanced techniques. The crochet community values patience, precision, and shared learning—qualities embodied in a well-executed foundation chain.
Furthermore, social media platforms like Instagram and TikTok have amplified the visual appeal of chaining. Slow-motion videos of smooth, rhythmic chains going row after row garner thousands of views, not because they’re flashy, but because they represent calm, focused creation. Teaching how to crochet a simple chain stitch step by step aligns perfectly with this cultural moment: it’s meditative, repeatable, and deeply satisfying when done well. For content creators and small business owners, this makes chaining tutorials evergreen assets that continue to drive traffic and engagement long after publication.
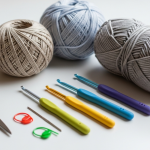
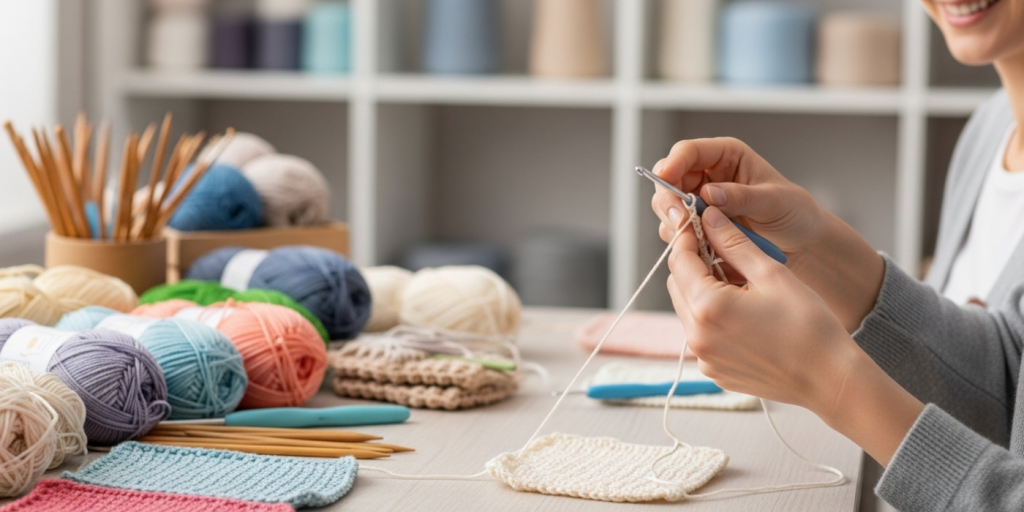
Materials, Tools, or Resources Needed
Before you begin practicing the chain stitch, gather the following essentials. While minimalism is part of crochet’s charm, using the right tools from the start prevents unnecessary struggle:
- Crochet Hook: Choose a size appropriate for your yarn (check the yarn label). For beginners, a medium-sized hook (such as US H/8 or 5.0 mm) in aluminum or ergonomic plastic offers good control and visibility.
- Yarn: A smooth, light-colored worsted-weight (Category 4) yarn is ideal for learning. Avoid dark colors (hard to see stitches), fuzzy textures (obscure stitch definition), or slippery fibers like silk (hard to control).
- Scissors: Sharp, small scissors for cleanly cutting yarn.
- Tapestry Needle: Useful later for weaving in ends, though not needed for chaining itself.
- Stitch Markers (optional): Helpful for marking the beginning of a chain if working in rounds or counting long sequences.
- Measuring Tape or Ruler: To check chain length if following a pattern with specific dimensions.
- Notebook or Digital App: To record your chain count, hook size, and yarn used—critical for replicating results.
Avoid using novelty yarns (e.g., eyelash, ribbon, or thick-thin variegated) until you’ve mastered consistent tension. These can mask errors and make it harder to see individual loops.
Yarn Types and Fiber Considerations
Not all yarns behave the same when chained. Understanding fiber properties helps you anticipate how your chain will drape, stretch, and hold its shape:
- Acrylic: Affordable, durable, and forgiving. Holds stitch definition well and is great for practice. However, it can be slightly slippery, so maintain firm (not tight) tension.
- Cotton: Less elastic than wool, so chains may feel stiffer. Ideal for items needing structure (like dishcloths or market bags), but requires consistent tension to avoid curling.
- Wool: Naturally elastic and grippy, making it easier to control stitch formation. Excellent for garments where drape matters. Superwash wool is machine-washable but may be smoother and slightly more slippery.
- Bamboo/Rayon: Silky and drapey, but very slippery. Best avoided by beginners; better suited for advanced lace work once tension is mastered.
- Blends: Many yarns combine fibers (e.g., wool-acrylic or cotton-bamboo). Check the label for care instructions and consider how elasticity and texture affect chaining.
From working with multiple crochet brands, I’ve observed that yarn weight dramatically influences chain behavior. A bulky yarn (Category 5) creates large, open chains that may gap, while fingering weight (Category 1) demands precision to avoid tiny, tight loops. Always swatch your chain before committing to a large project—measure how many chains equal 4 inches (10 cm) to verify your gauge matches the pattern.
Skill Level Breakdown
Beginner
If you’ve never held a crochet hook, the chain stitch is your starting point. Focus on forming consistent loops without splitting the yarn. Don’t worry about speed—accuracy and relaxation come first. Expect to redo chains several times; this is normal and part of the learning curve.
Intermediate
You can chain confidently but may struggle with long chains (over 100 stitches) or maintaining even tension throughout. At this stage, refine your technique: ensure all chains are the same size, learn to count without losing your place, and experiment with different yarn weights.
Advanced
Experienced crocheters use the chain stitch not just as a foundation but as a design element—creating picots, adjustable rings, or decorative edgings. They understand how to modify chain length for different stitch heights (e.g., chaining 3 for double crochet vs. 1 for single) and can troubleshoot gauge issues instantly. Mastery here means chaining feels automatic, freeing mental space for complex pattern reading.
Regardless of level, revisiting the basics periodically sharpens your overall skill. Many professionals I’ve collaborated with still practice chaining daily as a warm-up exercise.
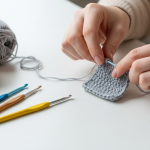
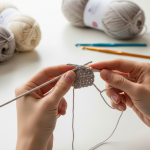
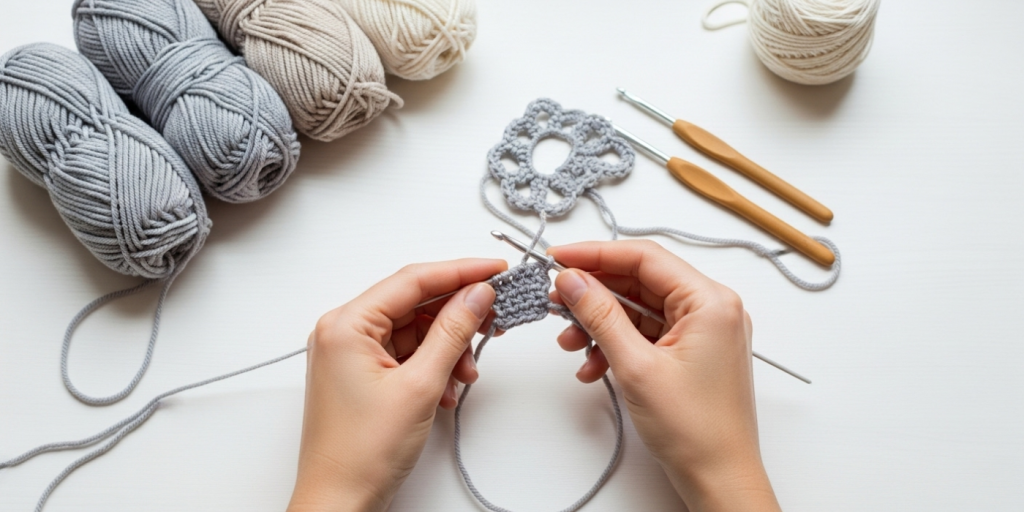
Step-by-Step Guide: How to Crochet a Simple Chain Stitch Step by Step
Follow these detailed instructions slowly. Rushing leads to mistakes that compound later.
Step 1: Make a Slip Knot
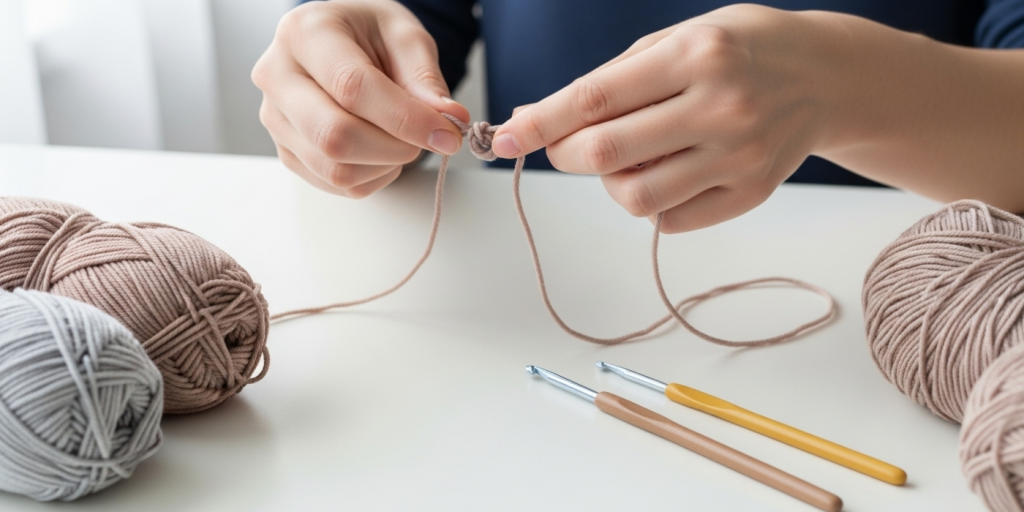
- Hold the yarn tail (short end) in your left hand, leaving a 6-inch (15 cm) tail.
- Wrap the working yarn (from the skein) around your index and middle fingers twice.
- Pull the second loop through the first to form a loose knot.
- Slide the knot onto your hook and gently tighten by pulling the working yarn. The loop should sit snugly but rotate freely on the hook.
Pro Tip: The slip knot counts as your first chain in some patterns—but not all. Always check pattern notes. When practicing, don’t count it as a chain unless specified.
Step 2: Hold the Hook and Yarn Correctly
- Hook Grip: Hold the hook like a pencil (overhand) or like a knife (underhand)—whichever feels natural. Keep your wrist relaxed.
- Yarn Tension: Drape the working yarn over your left index finger (if right-handed). Use your pinky and ring finger to lightly anchor the yarn, allowing controlled feed. Your index finger acts as a “tension dial”—pressing down tightens, lifting loosens.
Step 3: Form the First Chain
- Yarn Over (YO): Rotate your hook upward and catch the working yarn from back to front with the hook’s throat.
- Pull Through: Gently pull the yarn through the loop already on your hook. You’ve just made one chain stitch!
- Repeat: Continue yarn overs and pulling through. Each motion creates one new chain.
Step 4: Maintain Consistent Tension
- Keep your hands relaxed. Tension comes from your fingers guiding the yarn, not from gripping the hook tightly.
- Watch the base of each chain (the two strands at the bottom). They should be uniform in size—not too tight (hard to insert hook later) or too loose (causing gaps).
Step 5: Count Your Chains
- Count the V-shaped tops of the chains, not the slip knot (unless instructed otherwise).
- For long chains, place a stitch marker every 10 or 20 stitches to avoid recounting.
- If you lose count, don’t guess—undo and restart. Accuracy prevents misalignment in subsequent rows.
Step 6: Finish the Chain
- Once you reach your desired number, cut the yarn, leaving a 6-inch tail.
- Yarn over and pull the tail completely through the last loop to secure.
Practice chaining 20 stitches repeatedly until the motion feels fluid. Then try 50, then 100. Speed will come with time—consistency is the goal.
Common Mistakes and How to Avoid Them
Even seasoned crocheters occasionally fall into these traps. Awareness is half the battle:
1. Twisted or Tight Chains
Cause: Pulling the yarn too firmly or rotating the hook inward. Fix: Relax your grip. Imagine the chain should drape softly—if it stands upright or curls, it’s too tight. Practice with a larger hook temporarily to build looser habits.
2. Splitting the Yarn
Cause: Inserting the hook into the plies of the yarn instead of under the full strand. Fix: Use smooth yarn and ensure your hook tip enters the loop cleanly. Blunt-tipped hooks (like Boye) are less likely to split than pointed ones (like Clover).
3. Inconsistent Loop Sizes
Cause: Varying tension due to distraction, fatigue, or changing hand position. Fix: Work in short sessions. Pause every 20 chains to check uniformity. Record yourself chaining to spot unconscious tension shifts.
4. Missing or Extra Chains
Cause: Losing count during long sequences. Fix: Use stitch markers at intervals. Say the number aloud as you chain. Some crocheters tap their foot or use a clicker counter.
5. Curling Foundation Chain
Cause: Chains worked too tightly relative to the stitches that follow. Fix: Chain with a hook one or two sizes larger than your project hook, then switch back for Row 1. This gives the foundation more give.
6. Forgetting the Turning Chain
Cause: Confusing the foundation chain with the turning chain at the start of a new row. Fix: Remember: the foundation chain starts the project; the turning chain lifts your work to the height of the next stitch type (e.g., ch 1 for sc, ch 3 for dc).
Advanced Tips and Professional Insights
Once you’ve mastered the basics, these refinements separate competent crocheters from exceptional ones:
- The “No-Knot” Start: Instead of a slip knot, leave a long tail and begin chaining directly. Later, weave the tail through the first few chains to secure. This eliminates bulk at the edge—ideal for seamless garments.
- Chaining in the Round: For amigurumi or hats, use a magic ring instead of a chain to avoid a hole in the center. But if chaining, join with a slip stitch carefully to prevent twisting.
- Tension Calibration: Before starting a project, chain 20 stitches and work a row of single crochet. If the foundation ripples, your chain is too loose; if it cups inward, it’s too tight. Adjust accordingly.
- Speed Chaining: Advanced crocheters develop a rhythmic “flick” of the wrist to accelerate chaining without sacrificing consistency. This takes months of practice—don’t force it.
- Reading Your Chain: Learn to recognize the front and back loops. The back bump (third loop) is often used in ribbing for stretch. Knowing these parts helps when patterns specify “back loop only.”
Experienced designers often recommend chaining at the end of the day when hands are warmed up—many find their tension more consistent then. Also, natural light reveals stitch inconsistencies better than artificial light, so practice near a window when possible.
Real-World or Hypothetical Examples
Consider Sarah, a small-business owner who sells handmade baby blankets on Etsy. Her early listings received mixed reviews: “Beautiful colors, but the edges are wavy.” After analyzing her process, she realized her foundation chains were too tight compared to her single crochet rows. She began chaining with a 6.0 mm hook (one size up from her 5.0 mm project hook) and saw immediate improvement. Customer satisfaction rose, and her shop gained repeat buyers.
In another case, a pattern designer named Marco released a lace shawl requiring a 200-chain foundation. Testers reported the shawl was narrower than expected. Marco discovered his test yarn had more twist than the recommended brand, causing tighter chains. He updated the pattern with a gauge note: “Chain should measure 18 inches unstretched; adjust hook size if needed.” This small addition prevented future confusion and built trust with his audience.
These examples show how how to crochet a simple chain stitch step by step isn’t just about technique—it’s about problem-solving, communication, and adaptability in real creative economies.
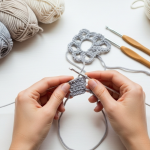
Customization and Adaptation Ideas
The chain stitch is far more versatile than a mere foundation:
- Decorative Edging: Add picot chains (ch 3, sl st into first ch) along borders for a delicate finish.
- Adjustable Closures: Use long chains as ties for baby booties or drawstring bags.
- Lace Motifs: Chains form the arches in filet crochet or Irish crochet motifs.
- Buttonholes: Skip stitches and replace with a chain space of equal width.
- Gauge Swatches: Always start swatches with a chain long enough to work 4–6 inches wide, plus extra for edge distortion.
For modern makers, chains can be combined with other techniques: Tunisian crochet uses a forward pass of chains, and broomstick lace relies on loops held on a dowel before chaining them together. Experimentation turns this basic stitch into a gateway for innovation.
Care, Maintenance, or Best Practices
While the chain stitch itself doesn’t require special care, projects built on it do:
- Blocking: Always block finished items. A blocked chain evens out minor tension flaws and opens up lace patterns.
- Weaving Ends: Secure the starting tail by weaving it through the back bumps of the foundation chain—this hides it and reinforces the edge.
- Storage: Roll unused chained swatches loosely; folding can create permanent creases in stiff yarns like cotton.
- Pattern Notes: When writing your own patterns, specify whether the turning chain counts as a stitch. Ambiguity here causes widespread errors.
Remember: a well-made chain lasts the life of the project. Taking time to perfect it upfront saves hours of fixing later.
Monetization Opportunities
Mastering the chain stitch opens several revenue streams for craft entrepreneurs:
- Digital Patterns: Create beginner-friendly PDFs focused solely on chaining variations (e.g., “10 Chain-Stitch Edgings for Blankets”).
- Video Courses: Platforms like Skillshare or Teachable host highly rated classes on foundational crochet—chaining is always Module 1.
- YouTube Tutorials: Short, clear videos on “perfect chaining” attract consistent organic traffic. Monetize via AdSense and affiliate links to recommended hooks/yarn.
- Workshops: Local craft stores or libraries often pay instructors for beginner crochet demos. Position yourself as the “chaining expert.”
- Custom Kits: Sell curated kits with labeled yarn, appropriately sized hooks, and printed chaining guides—ideal for gifts or self-learners.
Importantly, educational content should empower, not overwhelm. Avoid jargon; show close-ups of hand positioning; acknowledge common frustrations. Authenticity builds audience loyalty faster than perfection.
Frequently Asked Questions (FAQ)
1. How many chains do I need to start a blanket?
It depends on your yarn weight, hook size, and desired width. Make a gauge swatch: chain 20, work a few rows in your chosen stitch, then measure how many stitches = 4 inches. Multiply that ratio by your blanket width.
2. Why does my chain curl or twist?
Tight tension is the usual culprit. Try chaining with a larger hook, or ensure you’re not rotating your hook inward as you work. Also, check that you’re not accidentally working into the back bump, which can cause twisting.
3. Does the slip knot count as a chain?
Generally, no—but always check your pattern. Most modern patterns exclude the slip knot from the chain count. When in doubt, count the V-shaped tops only.
4. Can I undo just part of a chain without starting over?
Yes! Gently pull the working yarn to “frog” (rip out) back to your error. If you’ve already worked into the chain, you’ll need to undo those rows too.
5. How do I keep my chain from getting twisted when joining in the round?
Lay the chain flat on a table before joining. Ensure all Vs face the same direction (no twists). Use a stitch marker in the first chain to track the round’s start.
6. What’s the difference between a chain stitch and a slip stitch?
A chain stitch (ch) creates a new loop on the hook and extends the foundation. A slip stitch (sl st) joins stitches or moves yarn without adding height—it’s worked by inserting the hook, yarn over, and pulling through both loops at once.
Conclusion
Learning how to crochet a simple chain stitch step by step is more than memorizing motions—it’s about cultivating mindfulness, precision, and respect for the craft’s foundations. Every expert crocheter, every successful handmade brand, and every beloved pattern begins with this unassuming loop. By investing time in perfecting your chain, you’re not just preparing for your next project; you’re building a reliable skill that will serve you across decades of creativity.
Don’t be discouraged by initial unevenness or miscounts. Even today, I occasionally frog a chain that feels “off”—because excellence is a habit, not a one-time achievement. Grab your hook, choose a cheerful skein of yarn, and chain with intention. With each loop, you’re not just making fabric; you’re weaving confidence, one stitch at a time.

Helena Nogueira é uma entusiasta do crochê e do artesanato, explorando novas técnicas e projetos em busca de criações únicas e cheias de personalidade. Apaixonada por criatividade e desenvolvimento pessoal, ela alia dedicação e curiosidade para transformar fios em arte, cultivando hábitos que impulsionam seu crescimento enquanto compartilha beleza e inspiração com quem valoriza o feito à mão.