Introduction
Tapestry crochet is one of the most rewarding techniques in the world of fiber arts. It allows crocheters to create intricate, multicolored designs without weaving in dozens of loose ends or relying on post-stitch embroidery. At its core, tapestry crochet for clean color changes is about carrying unused yarns within your stitches while working with multiple colors in a single row or round. This method not only produces crisp, professional-looking patterns but also ensures durability and structure—ideal for items like bags, home décor, and wearable art.
For decades, tapestry crochet has been a staple in traditional crafts across South America, Scandinavia, and West Africa. Today, it’s experiencing a global resurgence, especially among indie makers and small handmade businesses seeking to stand out in saturated markets. But despite its visual appeal, many crocheters struggle with tension issues, messy floats, or inconsistent color transitions. That’s where this guide comes in.
Whether you’re a beginner looking to expand your skill set or an experienced designer refining your technique, this comprehensive resource will walk you through every aspect of tapestry crochet—from yarn selection and foundational stitches to monetization strategies and professional finishing tips. By the end, you’ll not only understand how to execute clean color changes but also why certain methods yield superior results in both aesthetics and function.
What This Topic Means for Crochet & Knitting Businesses
In the handmade economy, visual storytelling is everything. Customers don’t just buy a tote bag—they buy the narrative behind the pattern, the craftsmanship, and the uniqueness of the piece. Tapestry crochet for clean color changes directly enhances that narrative by enabling makers to produce bold, graphic designs that feel intentional and polished.
From working with multiple crochet brands over the years, I’ve observed a clear trend: products featuring well-executed tapestry work consistently outperform solid-color or poorly striped alternatives in online marketplaces like Etsy and Instagram shops. Why? Because clean color transitions signal expertise. They tell the buyer, “This maker knows their craft.”
Moreover, tapestry crochet minimizes post-production labor. Unlike intarsia or stranded knitting—which require weaving in numerous ends—tapestry crochet encases unused yarns within the fabric itself. This reduces finishing time, a critical factor for small businesses operating on tight margins. In many crochet businesses, efficiency in production directly correlates with profitability, and tapestry techniques offer a rare balance of artistic expression and operational practicality.
Additionally, the technique opens doors to customization. Offering personalized name blankets, logo totes, or culturally inspired wall hangings becomes feasible when you can switch colors seamlessly within a single row. This adaptability is invaluable in today’s market, where consumers increasingly seek meaningful, one-of-a-kind items.
Why This Strategy Works Especially Well in the Crochet Community
Unlike knitting, which often relies on multiple needles and complex tension management across stitches, crochet uses a single hook and builds fabric row by row (or round by round). This structural simplicity makes it uniquely suited for tapestry crochet for clean color changes.
Experienced designers often recommend tapestry crochet over other colorwork methods because:
- It’s inherently portable: You only carry two or three yarns at a time, making it ideal for on-the-go crafting.
- Mistakes are easier to fix: Since you’re working with live stitches, you can frog (rip out) back to an error without unraveling an entire section.
- It creates a dense, durable fabric: The carried yarns add thickness and stability—perfect for functional items like coasters, baskets, or market bags.
- It’s highly scalable: Once you master the basics, you can tackle anything from pixel-style amigurumi to large-scale geometric rugs.
Furthermore, the crochet community thrives on visual sharing. Platforms like Pinterest and TikTok favor high-contrast, colorful projects—and tapestry crochet delivers exactly that. A well-photographed tapestry coaster or plant hanger can go viral, driving traffic to your shop or blog. In fact, several successful handmade brands I’ve consulted for attribute their initial growth spurt to a single tapestry crochet tutorial that resonated with thousands of viewers.
The technique also aligns with current consumer values: sustainability and slow fashion. By using small amounts of leftover yarns (often called “stash busting”), makers reduce waste while creating visually rich pieces. This eco-conscious angle strengthens brand messaging and appeals to mindful shoppers.
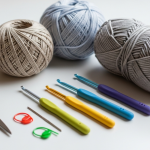
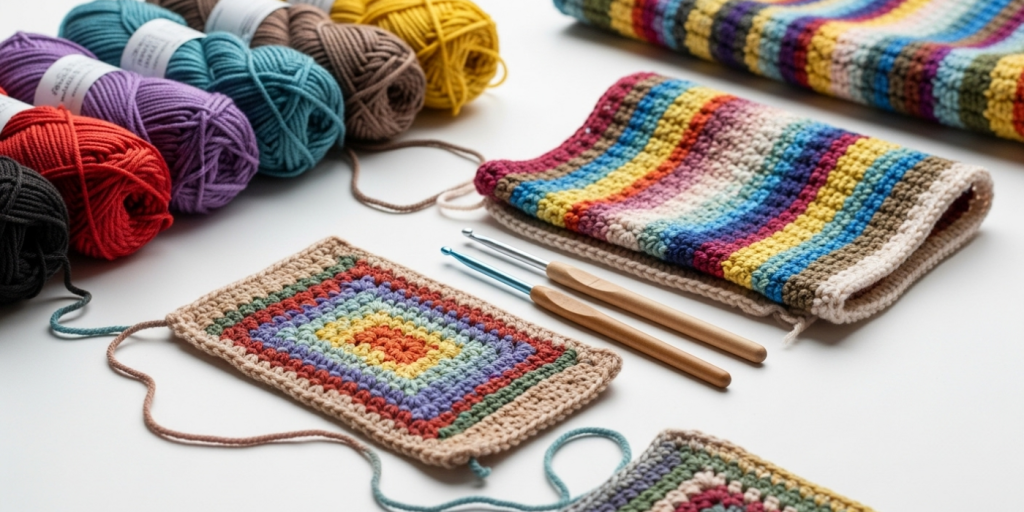
Materials, Tools, or Resources Needed
To practice tapestry crochet for clean color changes, you don’t need an elaborate toolkit—but precision matters. Here’s what I recommend based on years of teaching workshops and developing patterns for commercial use:
Essential Tools:
- Crochet hook: Use a hook 1–2 sizes smaller than recommended on the yarn label. Tighter tension helps conceal carried yarns. For worsted weight, a 3.5mm or 4.0mm hook often works best.
- Sharp scissors: For cleanly snipping yarn without fraying.
- Yarn needle: Only needed if you must weave in a few stray ends (e.g., at the start or finish).
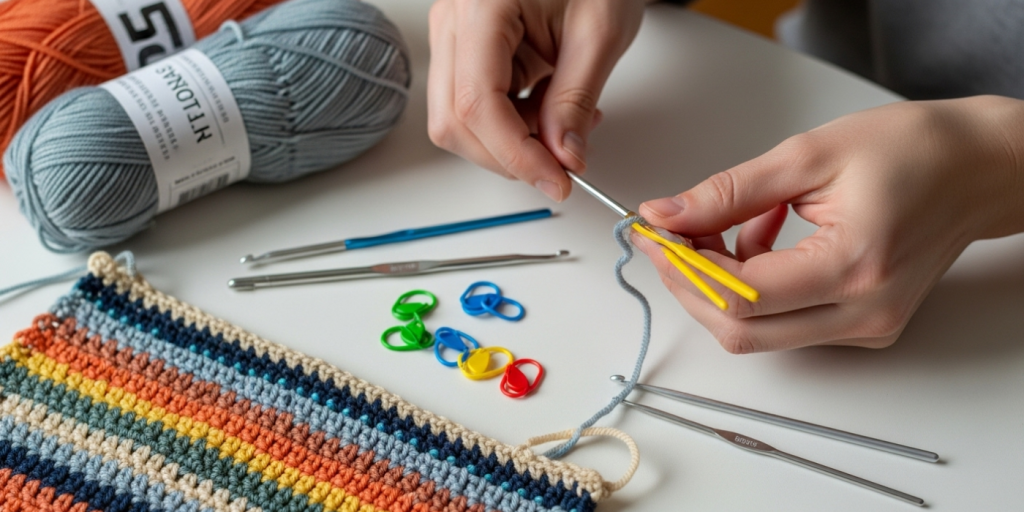
- Stitch markers: Helpful for tracking pattern repeats, especially in the round.
- Graph paper or digital charting software: To plan or follow color charts.
Optional but Helpful:
- Ergonomic hook: Reduces hand fatigue during long sessions.
- Yarn bobbins or small containers: Keep active colors tangle-free.
- Row counter: Useful for complex patterns with frequent color shifts.
Pro Tip: Avoid using hooks with wide throats or deep grooves—they can snag carried yarns and distort tension. Smooth, tapered hooks (like those from Furls or Clover) glide more easily over multiple strands.
Yarn Types and Fiber Considerations
Not all yarns behave the same in tapestry crochet. The ideal choice balances stitch definition, elasticity, and smoothness.
Best Yarn Choices:
- 100% Cotton (e.g., Lion Brand 24/7 Cotton, Scheepjes Catona): Non-stretchy, holds shape well, and shows clean lines. Excellent for home goods and structured accessories.
- Mercerized Cotton: Adds sheen and extra smoothness, enhancing color clarity.
- Acrylic (e.g., Paintbox Simply DK): Affordable, widely available, and consistent in thickness—great for beginners.
- Wool Blends (for wearables): Offer warmth and slight elasticity, but ensure they’re not too fuzzy, as halo can blur color boundaries.
Yarns to Avoid:
- Mohair, alpaca, or bouclé: Their texture obscures stitch definition.
- Variegated or self-striping yarns: Compete with your intentional colorwork.
- Very slippery yarns (e.g., silk or bamboo-heavy blends): Can cause tension inconsistencies when carrying multiple strands.
Fiber content also affects care. If you’re making items for sale, always consider washability. Cotton and acrylic are machine-washable—key for customer satisfaction. From working with multiple crochet brands, I’ve seen returns drop significantly when product descriptions clearly state “easy-care fibers used.”
Use worsted weight (Category 4) or DK weight (Category 3) yarns for optimal control. Thinner yarns (like fingering) require extreme precision and are better suited for advanced practitioners.
Skill Level Breakdown
Beginner:
You should be comfortable with basic stitches (single crochet, chain) and reading simple written patterns. Start with two-color geometric motifs (stripes, chevrons) in the round—like coasters or granny squares. Focus on consistent tension before tackling complex charts.
Intermediate:
You can follow graph-based patterns and manage 2–3 colors per row. Try rectangular projects (tote bags, pillow covers) worked flat. Learn to read charts backward on wrong-side rows—a common stumbling block.
Advanced:
You handle 4+ colors, manage tension intuitively, and can troubleshoot float tension on the fly. Suitable for large-scale projects like rugs, garments, or custom commissions with photographic-level detail.
Note: Even advanced crocheters benefit from swatching. Always test your tension and color contrast on a 4″x4″ sample before committing to a full project.
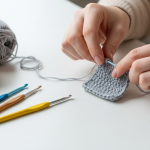
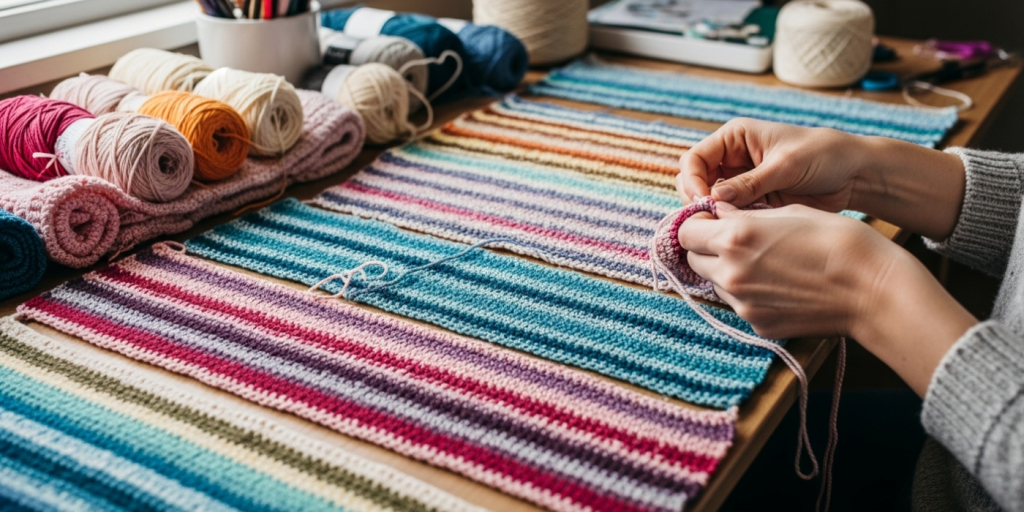
Step-by-Step Guide to Tapestry Crochet for Clean Color Changes
Follow these detailed steps to achieve professional results. We’ll use a simple two-color stripe pattern as an example.
Step 1: Prepare Your Yarns
- Cut manageable lengths (approx. 18–24 inches) to prevent tangling.
- Hold both yarns in your non-dominant hand (or whichever hand you tension with).
Step 2: Begin with the First Color
- Chain your foundation (e.g., 20 chains for a swatch).
- Work the first row in Color A using single crochet (sc).
Step 3: Introduce the Second Color
- When you reach the last stitch before the color change, complete the stitch up to the final pull-through. You’ll have two loops on your hook.
- Drop Color A. Pick up Color B and pull through both loops to complete the stitch. This anchors Color B cleanly.
Step 4: Carry the Unused Yarn
- As you work the next stitch in Color B, lay Color A across the top of your previous row.
- Insert your hook, yarn over with Color B, and pull up a loop—over the carried Color A.
- Complete the sc. The carried yarn is now trapped inside the new stitch.
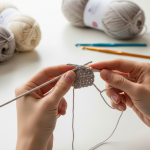
Step 5: Maintain Consistent Tension
- Keep the carried yarn snug but not tight. Too loose = visible floats on the wrong side; too tight = puckered fabric.
- Practice “twisting” the yarns slightly at color changes to prevent gaps (more on this in Advanced Tips).
Step 6: Changing Back to Color A
- Repeat Step 3: work to the last pull-through in Color B, then switch to Color A to finish the stitch.
- Now carry Color B while working in Color A.
Step 7: Working in the Round (Common for Bags & Hats)
- Always work on the right side. No wrong-side rows means your chart reads left-to-right continuously.
- Use a stitch marker to mark the beginning of each round.
- Keep carried yarns to the inside of the tube for seamless appearance.
Step 8: Managing Floats Over Long Distances
- Never carry yarn over more than 3–4 stitches. For longer gaps, cut and rejoin later.
- If unavoidable, “catch” the float every 3rd stitch by working over it briefly.
Real-World Example: When designing a market tote with a bold logo, I limit color runs to 4 stitches max. Any longer, and the interior floats become bulky and uncomfortable against the skin.
Common Mistakes and How to Avoid Them
Even seasoned crocheters encounter pitfalls. Here’s how to sidestep them:
1. Loose or Visible Floats
- Cause: Carried yarn too slack.
- Fix: Hold the inactive yarn taut against your work as you stitch over it. Think of it like “hugging” the float.
2. Puckered or Wavy Fabric
- Cause: Over-tightening carried yarns.
- Fix: Relax your grip. The carried yarn should lie flat, not strangled.
3. Gaps at Color Changes
- Cause: Not twisting yarns or completing the anchor stitch properly.
- Fix: Always finish the transition stitch with the new color. Optionally, give the two yarns a half-twist behind your work before continuing.
4. Uneven Tension Between Colors
- Cause: Different yarn weights or inconsistent hook handling.
- Fix: Use yarns from the same brand/line. Swatch extensively.
5. Twisted Carried Yarns
- Cause: Letting yarns wrap around each other between stitches.
- Fix: Periodically untwist your working yarns every few rows.
6. Bulky Seams in Flat Work
- Cause: Carrying yarn up the side edge instead of cutting.
- Fix: For vertical stripes, cut and rejoin at the edge rather than carrying up.
Advanced Tips and Professional Insights
After teaching hundreds of students and consulting for handmade brands, these insights separate hobbyists from professionals:
✦ The “Russian Join” for Seamless Transitions
Instead of knots, splice yarn ends together using the Russian join. It’s nearly invisible and adds no bulk—critical for fine tapestry work.
✦ Reading Charts Like a Pro
- For flat work: Right-side rows read right-to-left; wrong-side rows read left-to-right.
- For in-the-round: All rounds read right-to-left.
- Highlight completed rows on your chart to avoid miscounts.
✦ Tension Calibration Trick
Work a “tension square” using your exact hook, yarn, and technique. Measure stitches per inch. Adjust hook size until your gauge matches the pattern’s intent—especially important for fitted items.
✦ Minimizing Yarn Consumption
Carried yarns use more yardage. Calculate 10–15% extra per color when planning large projects.
✦ Using a “Guide Finger”
Drape the inactive yarn over your index finger while tensioning the active one. This keeps floats organized and consistent.
Experienced designers often recommend practicing on small, low-stakes projects (like mug rugs) before investing in expensive yarns. Mastery comes from repetition, not perfection on the first try.
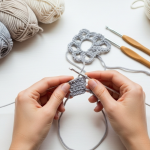
Real-World or Hypothetical Examples
Consider “Luna Craft Co.,” a hypothetical Etsy shop specializing in boho-inspired home goods. Their bestseller? A tapestry crochet plant hanger featuring a mandala motif in earthy tones. By using tapestry crochet for clean color changes, they achieved:
- Crisp lines between terracotta, sage, and cream.
- No loose ends inside the hanger (which could snag or irritate).
- A dense fabric that supports heavy ceramic pots without stretching.
They priced it at $38—$12 above competitors’ solid-color versions—justifying the premium with visible craftsmanship. Their product photos zoomed in on the seamless transitions, and their listing included a short video showing the technique in action. Result? 200+ sales in three months and features in two handmade lifestyle blogs.
Another example: a crochet instructor launched a digital pattern for a “Pixel Heart” pouch using only two colors. The tutorial emphasized clean color changes, and the PDF included troubleshooting tips for common float issues. It became her top-selling pattern because it solved a real pain point for learners.
These cases prove that technical excellence in tapestry crochet for clean color changes translates directly into market differentiation and customer trust.
Customization and Adaptation Ideas
Once you’ve mastered the basics, the creative possibilities explode:
- Personalized Gifts: Spell names in block letters using graph paper.
- Cultural Patterns: Incorporate traditional motifs (e.g., Andean diamonds, Scandinavian stars).
- Seasonal Collections: Pumpkin patches for fall, snowflakes for winter.
- Brand Collaborations: Create co-branded totes with local coffee shops using their logo colors.
- Modular Design: Make interchangeable panels (e.g., a bag front with removable tapestry inserts).
For businesses, offer “design-your-own” kits with pre-measured yarns and a blank chart template. This boosts average order value while engaging customers creatively.
Care, Maintenance, or Best Practices
Tapestry crochet items require thoughtful care to preserve their integrity:
- Washing: Hand-wash or gentle machine cycle in cold water. Lay flat to dry—never wring.
- Storage: Fold, don’t hang heavy tapestry pieces (like rugs), to prevent stretching.
- Pilling: Use a fabric shaver sparingly on cotton/acrylic blends.
- Longevity Tip: Block finished items to even out tension and enhance drape.
Always include a care card with sold items. It shows professionalism and reduces customer service inquiries.
Monetization Opportunities
Mastering tapestry crochet for clean color changes opens multiple revenue streams:
- Finished Goods: Sell high-margin items like laptop sleeves, wall art, or baby blankets.
- Digital Patterns: Create charted PDFs with written instructions and video support.
- Workshops: Host live or recorded classes focusing on colorwork techniques.
- Custom Commissions: Offer bespoke designs for weddings, corporate gifts, or pet portraits.
- Yarn Kits: Partner with indie dyers to curate color packs for specific patterns.
- Affiliate Content: Review hooks, yarns, or tools in blog posts or YouTube tutorials.
In many crochet businesses, digital products provide passive income with near-zero overhead. A single well-optimized tapestry pattern can generate sales for years.
Focus on education, not hype. Teach your audience how to succeed, and they’ll trust you enough to buy from you.
Frequently Asked Questions (FAQ)
1. What is tapestry crochet?
Tapestry crochet is a colorwork technique where unused yarns are carried within the stitches, allowing for sharp, multicolored designs without cutting yarn between color changes.
2. How do you change colors cleanly in tapestry crochet?
Complete the last stitch of the old color up to the final pull-through, then use the new color to draw through the remaining loops. Carry the old color underneath as you work the next stitches.
3. Can beginners learn tapestry crochet?
Yes! Start with two colors and simple geometric patterns. Use cotton yarn and a smaller hook for better control.
4. Why does my tapestry crochet look bumpy?
Bumps usually come from uneven tension or overly tight carried yarns. Practice keeping floats relaxed but secure.
5. How many colors can you use in tapestry crochet?
While possible to use many, stick to 2–3 colors per row for best results. More colors increase bulk and tension challenges.
6. Is tapestry crochet the same as fair isle?
No. Fair isle is a stranded knitting technique. Tapestry crochet is specific to crochet and involves working over carried yarns with a single hook.
Conclusion
Tapestry crochet for clean color changes is more than a technique—it’s a gateway to professional-quality craftsmanship, creative expression, and sustainable business growth. By mastering tension control, strategic yarn management, and thoughtful design, you can produce pieces that delight customers and stand the test of time.
Whether you’re making a gift for a loved one or building a handmade brand, remember: precision in the details builds trust. Every clean corner, every invisible float, every consistent stitch whispers competence.
Start small. Swatch relentlessly. Embrace mistakes as lessons. And soon, you’ll not only create beautiful tapestry work—you’ll understand why it works, how to teach it, and how to turn it into something meaningful.
Now grab your hook, choose two contrasting yarns, and begin. Your next masterpiece is just a few stitches away.

Helena Nogueira é uma entusiasta do crochê e do artesanato, explorando novas técnicas e projetos em busca de criações únicas e cheias de personalidade. Apaixonada por criatividade e desenvolvimento pessoal, ela alia dedicação e curiosidade para transformar fios em arte, cultivando hábitos que impulsionam seu crescimento enquanto compartilha beleza e inspiração com quem valoriza o feito à mão.