Introduction
One of the most common frustrations among crocheters—whether hobbyists or professionals—is following a pattern only to end up with a garment that’s too tight, too short, or just “off.” The truth is, adjusting crochet patterns for custom size and fit isn’t just a luxury; it’s a necessity in a world where bodies are diverse and mass-produced sizing rarely tells the whole story. Unlike sewing, where commercial patterns offer multiple graded sizes, many crochet patterns—especially free or indie designs—come in one or two standard sizes with minimal guidance on modification.
Yet, mastering this skill transforms you from a passive follower into an empowered creator. You gain the ability to tailor hats to your head circumference, sweaters to your bust measurement, and blankets to your couch dimensions—all while preserving the design’s integrity. In this definitive guide, you’ll learn a systematic, stitch-by-stitch approach to resizing any crochet pattern confidently and accurately. Drawing from over a decade of experience designing for handmade brands, teaching workshops, and consulting with fiber entrepreneurs, I’ll walk you through every calculation, swatch tip, and structural consideration you need to achieve perfect, personalized fit—every time.
What This Topic Means for Crochet & Knitting Businesses

For handmade businesses, offering custom-fit items isn’t just a nice-to-have—it’s a powerful differentiator. In a saturated market where generic beanies and one-size-fits-all cardigans flood Etsy and Instagram, the ability to deliver garments tailored to individual measurements signals professionalism, care, and expertise.
From working with multiple crochet brands, I’ve seen firsthand how customization drives customer loyalty. A client who receives a sweater that fits their shoulders—not an industry average—is far more likely to leave a 5-star review, refer friends, and return for future commissions. Moreover, digital pattern sellers who include clear resizing instructions (or even a built-in size calculator) see significantly higher conversion rates and fewer support requests.
In many crochet businesses, the real profit margin lies not in volume, but in perceived value. A $65 custom-fit top feels justified when the customer knows their unique proportions were considered. And for pattern designers, providing scalable templates (e.g., “S–5X with ease adjustments”) expands your audience without multiplying your workload.
Why This Strategy Works Especially Well in the Crochet Community
Crochet is inherently modular. Unlike woven fabrics that require precise cutting, crochet builds fabric row by row, making it uniquely suited to incremental adjustments. Need 2 inches longer? Add a few rows. Want a looser armhole? Skip a decrease round. This flexibility aligns perfectly with the DIY ethos of the community.
Experienced designers often recommend teaching resizing as a core skill—not an advanced add-on. Why? Because it empowers makers to adapt vintage patterns, fix ill-fitting thrifted projects, or modify free designs found online. It also fosters creativity: once you understand the math behind a raglan sleeve, you can invent your own.
Additionally, the rise of body positivity and inclusive fashion has made custom fit not just practical, but ethical. Offering guidance on adjusting for high bust vs. full bust, broad shoulders, or long torsos shows respect for your customers’ lived experiences—a value deeply resonant in today’s handmade economy.
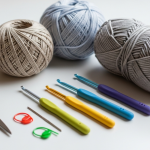
Materials, Tools, or Resources Needed
Before modifying any pattern, gather these essentials:
- Measuring tape: Flexible, non-stretch fabric tape (not metal).
- Notebook or digital spreadsheet: For tracking gauge, calculations, and modifications.
- Stitch markers: To mark key points like armholes or shaping zones.
- Yarn and hook specified in the original pattern: For accurate swatching.
- Calculator: Basic arithmetic is unavoidable—but don’t worry, we’ll simplify it.
- Pattern schematic (if available): A diagram showing finished measurements per size.
- Graph paper or digital grid tool: Helpful for visualizing increases/decreases.
Optional but highly recommended:
- Body measurement chart (printable templates online)
- Row counter
- Blocking mats and pins (to test final drape after resizing)
Yarn Types and Fiber Considerations
Yarn choice directly impacts how well your resized garment holds its shape. Not all fibers behave the same under tension or after washing.
Best for fitted garments:
- Wool or wool blends: Natural elasticity helps fabric recover after stretching—ideal for sweaters, socks, and hats.
- Cotton with nylon: Holds structure well for bags or structured tops, but lacks stretch; account for this in ease.
- Bamboo blends: Drape beautifully but can grow over time; add negative ease if used for fitted items.
Use with caution:
- 100% acrylic: Can stretch out permanently if oversized; avoid for heavy coats or long cardigans unless reinforced.
- Linen or hemp: Minimal give; better for loose-fit or boxy styles.
- Mohair or fuzzy yarns: Obscure stitch definition, making it hard to count rows for precise length adjustments.
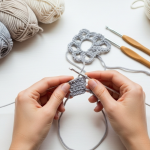
Always swatch and block your chosen yarn before calculating adjustments. A blocked swatch reveals true gauge and drape—critical for fit.
Skill Level Breakdown
Beginner
You should be comfortable with:
- Reading written patterns
- Basic stitches (sc, hdc, dc)
- Measuring your own body (bust, waist, hip, arm length)
Beginners can resize simple rectangles (scarves, dishcloths) or add/subtract repeats in motifs.
Intermediate
Ideal for those who:
- Understand gauge and its impact
- Can work shaping (increases/decreases)
- Have completed at least one wearable garment
This group can adjust sleeve length, add bust darts, or grade between sizes.
Advanced
For designers and professionals who:
- Create original patterns
- Modify complex constructions (raglan, set-in sleeves, yokes)
- Calculate ease and proportional scaling
Advanced users will tackle full grading across multiple sizes or redesigning silhouettes entirely.
Step-by-Step Guide to Adjusting Crochet Patterns for Custom Size and Fit
Step 1: Take Accurate Body Measurements
Measure over bare skin or thin clothing. Key points:
- Bust: fullest part, not bra band
- High bust: just under arms, above bust
- Waist: natural indentation (usually above navel)
- Hip: fullest part (often 7–9″ below waist)
- Back neck to waist: critical for torso length
- Armhole depth: from shoulder tip to underarm
- Sleeve length: shoulder to wrist
Write these down. Never guess.
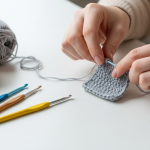
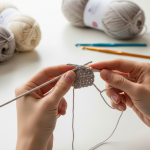
Step 2: Swatch and Determine Your Gauge
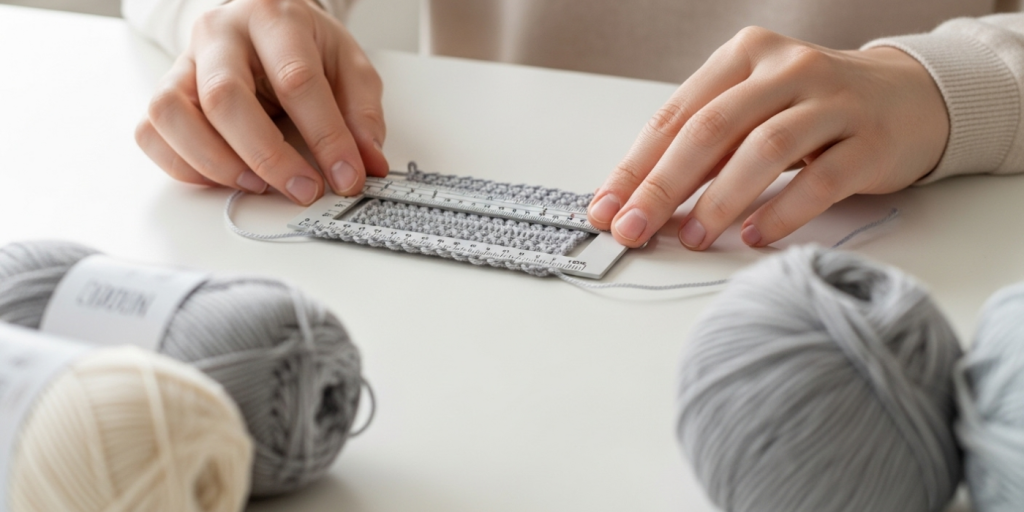
Crochet a 5″x5″ swatch in the pattern’s stitch. Block it exactly as you’ll finish the garment. Then measure:
- Stitches per inch (width)
- Rows per inch (height)
Example: 16 sts and 12 rows = 4″ → 4 sts/inch, 3 rows/inch.
Never skip this. Your gauge is your personal blueprint.
Step 3: Analyze the Original Pattern
Identify:
- Finished garment measurements (if provided)
- Ease (difference between body and garment size)
- Construction type (top-down, bottom-up, seamless, etc.)
- Shaping sections (armholes, waist darts, sleeve caps)
If no schematic exists, reverse-engineer it by counting stitches at key points.
Step 4: Calculate Required Stitch and Row Counts
Use this formula:
Target width (inches) × your gauge (sts/inch) = number of stitches needed
Target length (inches) × your gauge (rows/inch) = number of rows needed
Example: You need a 40″ bust. Your gauge is 4 sts/inch.
40 × 4 = 160 stitches for the bust circumference.
If the original pattern calls for 140 sts (35″ bust), you’ll need to add 20 stitches—distributed evenly across the front, back, and sleeves.
Step 5: Adjust Proportionally
Don’t just add stitches randomly. Maintain the design’s balance:
- For raglan sweaters: increase stitches in body and sleeves proportionally.
- For yoke tops: add repeats of the lace or cable motif.
- For A-line skirts: increase the rate of side increases.
Preserve the ratio of shaping. If the original decreases 1 st every 4 rows for armholes, do the same—but start earlier or later based on your armhole depth.
Step 6: Modify Length Independently
Length is often easier to adjust than width:
- Add or subtract rows in straight sections (body, sleeves, hem).
- For garments worked top-down, try it on as you go.
- For bottom-up, calculate extra rows before starting armhole shaping.
Tip: Add length below the bust for long torsos, not just at the hem.
Step 7: Test with a Muslin (Toile)
For complex garments, crochet a quick version in cheap yarn to test fit before committing to expensive fiber. Focus on shoulders, armholes, and bust—these are hardest to fix later.
Common Mistakes and How to Avoid Them
1. Ignoring Ease
Mistake: Making garment = body measurement → too tight.
Fix: Decide on desired ease first:
- Negative ease (-1 to -3″): snug fit (hats, gloves)
- Zero ease (0″): exact fit (some tops)
- Positive ease (+2 to +6″): relaxed fit (sweaters, cardigans)
2. Changing Hook Size Instead of Stitch Count
Mistake: Using a larger hook to make a garment bigger → alters drape and texture.
Fix: Keep hook and yarn consistent; adjust stitch/row count instead.
3. Forgetting Vertical vs. Horizontal Gauge
Mistake: Assuming 4 sts = 4 rows in space.
Fix: Measure both separately. Many stitches (like dc) are taller than wide.
4. Overlooking Yarn Substitution Effects
Mistake: Swapping bulky for sport weight without recalculating everything.
Fix: If changing yarn weight, treat it as a new design—re-swatch, re-measure, re-calculate.
5. Skipping the Try-On Phase
Mistake: Finishing entire sweater before checking fit.
Fix: For top-down pieces, try on after yoke. For bottom-up, measure against a similar well-fitting garment.
Advanced Tips and Professional Insights
After grading hundreds of patterns for clients and my own label, here’s what separates good from great:
1. Use the “High Bust” Method for Sweaters
For C-cup+ bodies, design the yoke or upper chest to fit your high bust (not full bust), then add bust darts or short rows below. This prevents gaping armholes.
2. Grade Between Sizes Mathematically
Don’t eyeball. Use linear interpolation:
Difference per size = (Size B – Size A) ÷ (B – A)
Example: Size M = 150 sts, Size L = 160 sts → +10 sts per size. For XL, use 170.
3. Preserve Motif Integrity
When adding width to a lace or cable pattern, add full repeats—not partial ones. If one repeat = 12 sts, add 12, 24, 36… never 15.
4. Account for Fabric Bias
Some stitches (like diagonal mesh) stretch more on the bias. Add extra ease in those directions.
5. Document Every Change
Keep a “pattern journal.” Note: “Added 8 rows below underarm for 32″ back length.” This becomes your personal library for future projects.
Real-World or Hypothetical Examples
Consider “Thread & Bloom,” a small business selling custom-fit crochet tops. Their signature “Willow Tee” pattern includes a worksheet where customers input bust, waist, and torso length. The designer uses a master Excel sheet that auto-calculates stitch counts based on the buyer’s gauge. Result? 92% customer satisfaction, zero returns for sizing issues.
Or imagine a maker adapting a vintage 1970s crochet vest pattern (written only for size 34″) for her 48″ bust. Instead of doubling the stitches (which would distort the lace), she adds two full lace repeats to the front panels and adjusts the armhole depth using her own measurements. The final piece honors the original design while fitting her body beautifully.
In many crochet businesses, this level of personalization turns one-time buyers into lifelong clients.
Customization and Adaptation Ideas
Once you grasp the fundamentals, explore creative adaptations:
- Petite or Tall Adjustments: Shorten or lengthen sleeves, torso, and rise without altering width.
- Maternity Modifications: Add extra room in the lower abdomen with strategic increases.
- Adaptive Clothing: Widen necklines for mobility, add button plackets for ease of dressing.
- Gender-Neutral Sizing: Use chest and hip measurements independently for non-binary fits.
- Plus-Size Styling: Emphasize vertical lines (like FPdc ribs) to create elongating effects.
Remember: customization isn’t about fixing bodies—it’s about honoring them.
Care, Maintenance, or Best Practices
A perfectly fitted garment deserves proper care to maintain its shape:
- Blocking: Always block after washing to reset dimensions. Pin to exact measurements if needed.
- Storage: Fold knits; hanging stretches shoulders and armholes.
- Washing: Follow yarn care instructions. Agitation can cause textured stitches to compact, altering fit.
- Seasonal Checks: Re-measure yourself annually. Bodies change—and your patterns should too.
For sellers: Include a printed care + fit guide with every order. It reduces post-purchase anxiety and builds trust.
Monetization Opportunities
Mastering pattern adjustment opens valuable revenue streams:
- Custom Commission Services: Offer made-to-measure garments with a fit consultation.
- Resizing Tutorials: Sell video courses or PDF guides on platforms like Etsy or Podia.
- Graded Pattern Packs: Release designs in 8+ sizes with detailed charts—premium buyers pay more for inclusivity.
- Fit Consultations: Provide 1:1 virtual sessions helping customers modify existing patterns.
- Subscription Content: Offer monthly “Fit Fix” tips or printable measurement trackers for Patreon supporters.
Key: Position yourself as a problem-solver. “Struggling with sweater fit? I’ll show you how to fix it” converts far better than “Buy my pattern.”
Frequently Asked Questions (FAQ)
1. How do I adjust a crochet pattern for a larger bust?
Use the high bust measurement for the upper body/yoke, then add short rows or bust darts below the armhole. Alternatively, choose a size based on your high bust and add width only through the bust section.
2. Can I resize a pattern without knowing my gauge?
No. Gauge is essential. Without it, you’re guessing. Always swatch and block before calculating.
3. What if the pattern doesn’t include finished measurements?
Reverse-engineer them: multiply stitch count by your gauge. Example: 120 sts × 0.25″ per st = 30″ width.
4. How much ease should I add for a cardigan?
Typically +4 to +8″ total for comfort and layering. Measure a favorite open-front sweater to compare.
5. Do I need to adjust both width and length?
Not always. Many people only need one (e.g., long arms but average torso). Adjust based on your unique proportions.
6. Is it easier to resize top-down or bottom-up garments?
Top-down allows real-time try-ons, making length and fit adjustments easier. Bottom-up requires more upfront math but offers stability in complex colorwork.
Conclusion
Learning how to adjust crochet patterns for custom size and fit is more than a technical skill—it’s an act of self-respect and creative empowerment. It allows you to wear garments that celebrate your body, not fight it. And for handmade entrepreneurs, it’s a cornerstone of building a trusted, customer-centric brand in an increasingly competitive market.
The process may seem daunting at first, but with careful measurement, honest swatching, and methodical calculation, you’ll gain confidence with every project. Start small: add two inches to a scarf, then tackle a hat, then a sweater. Each success builds your intuition.
Remember, there’s no such thing as a “standard” body—only unique ones. And crochet, with its infinite adaptability, is the perfect medium to honor that truth. So grab your tape measure, cast on with intention, and stitch something that fits you—exactly as you are.

Helena Nogueira é uma entusiasta do crochê e do artesanato, explorando novas técnicas e projetos em busca de criações únicas e cheias de personalidade. Apaixonada por criatividade e desenvolvimento pessoal, ela alia dedicação e curiosidade para transformar fios em arte, cultivando hábitos que impulsionam seu crescimento enquanto compartilha beleza e inspiração com quem valoriza o feito à mão.