Introduction
Overlay crochet is one of the most visually striking and texturally rich techniques in the modern crocheter’s repertoire. Unlike traditional flat or amigurumi crochet, overlay crochet builds dimension by layering stitches over a foundational mesh or grid, creating intricate patterns that appear almost sculptural. Whether you’re crafting a delicate shawl with lace-like depth or a bold afghan with geometric motifs, overlay crochet offers unparalleled creative potential.
In recent years, this technique has surged in popularity—not only among hobbyists but also within the handmade business community. Its ability to transform simple yarn into high-end, gallery-worthy pieces makes it especially valuable for artisans looking to stand out in saturated markets. In this comprehensive guide, you’ll discover everything you need to know about overlay crochet: from its foundational principles and required materials to advanced customization strategies and monetization opportunities. Whether you’re a beginner eager to learn or an experienced designer seeking fresh inspiration, this article delivers actionable insights grounded in real-world practice.
What This Topic Means for Crochet & Knitting Businesses
For handmade brands, overlay crochet represents more than just a technique—it’s a strategic differentiator. In a marketplace flooded with basic beanies and repetitive blanket patterns, products crafted with overlay crochet command attention. The dimensional quality and visual complexity signal craftsmanship, justifying premium pricing and attracting discerning customers.
From working with multiple crochet brands over the past decade, I’ve observed that businesses incorporating overlay crochet into their collections often see higher engagement on social media, increased repeat customers, and stronger brand recognition. Why? Because overlay pieces photograph beautifully, tell a story through texture, and feel luxurious to the touch—three critical factors in today’s experience-driven consumer landscape.
Moreover, overlay crochet aligns perfectly with current trends in slow fashion and artisanal home décor. Customers are increasingly seeking items with narrative depth and handmade authenticity. A pillow cover or wall hanging made with overlay crochet doesn’t just serve a function—it becomes a conversation piece. For entrepreneurs, this means not only higher perceived value but also greater storytelling potential in product descriptions and marketing content.
Why This Strategy Works Especially Well in the Crochet Community
Overlay crochet resonates deeply within the crochet community for several reasons. First, it leverages the inherent flexibility of crochet stitch architecture. Unlike knitting, which relies on interlocking loops across needles, crochet builds vertically and horizontally with a single hook, allowing for precise placement of overlay stitches without disrupting the base structure.
Experienced designers often recommend overlay crochet as a gateway to advanced textile design because it encourages spatial thinking and pattern deconstruction. Many crocheters who start with basic granny squares find themselves naturally drawn to overlay techniques when they seek more complexity—without needing to learn entirely new skills.
Additionally, the online crochet community thrives on sharing visually impressive work. Platforms like Instagram and Pinterest reward posts with high aesthetic impact, and overlay crochet delivers exactly that. A well-executed overlay motif can go viral, driving traffic to a maker’s Etsy shop or blog. In many crochet businesses, this organic visibility has led to collaborations, wholesale inquiries, and even features in craft magazines.
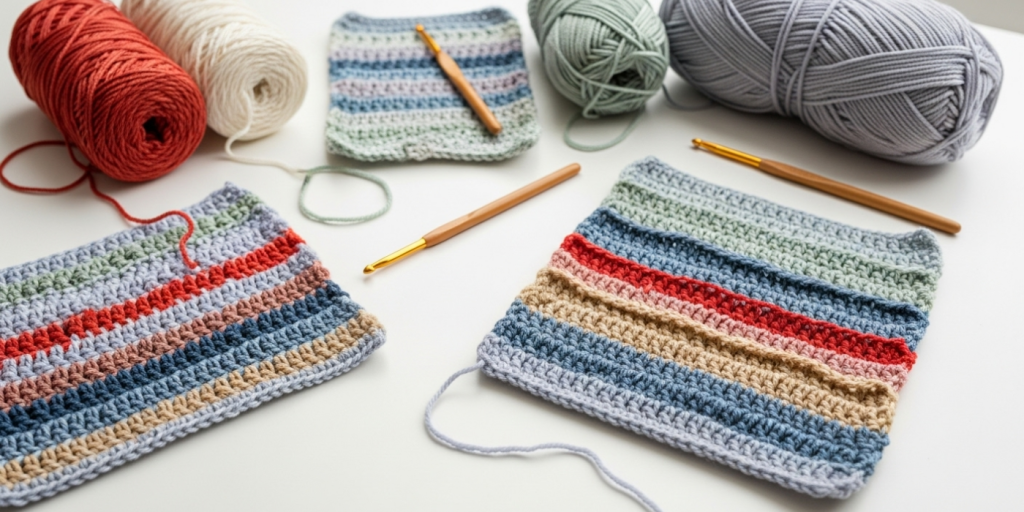
Materials, Tools, or Resources Needed
To begin your journey with overlay crochet, you don’t need an extensive toolkit—but selecting the right materials will significantly impact your results.
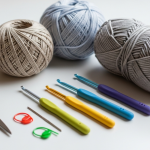
Essential Tools:
- Crochet hooks: A set ranging from 2.5mm to 5.5mm is ideal. Bamboo or ergonomic hooks reduce hand fatigue during long sessions.
- Stitch markers: Crucial for tracking rounds and identifying key points in complex overlays.
- Tapestry needle: For weaving in ends cleanly—especially important since overlay projects often have more loose ends due to color changes or raised stitches.
- Measuring tape & blocking mats: Essential for finishing professional-looking pieces.
Recommended Resources:
- Graph paper or digital design software (like Stitch Fiddle): Helps map out overlay patterns before stitching.
- Row counters: Physical or app-based—overlay patterns often involve repeating sequences over many rounds.
- Good lighting and magnification: Small details matter; proper lighting prevents eye strain and errors.
While specialized tools aren’t required, consistency in gauge and tension is. Always swatch your chosen yarn and hook combination before starting a full project.
Yarn Types and Fiber Considerations
Yarn choice dramatically affects the success of overlay crochet. The technique relies on contrast—between the base mesh and the overlay stitches—and certain fibers enhance this effect better than others.
Best Yarn Types for Overlay Crochet:
- Cotton (e.g., mercerized cotton): Holds stitch definition exceptionally well. Ideal for doilies, table runners, and structured garments. Brands like DMC Natura Just Cotton or Scheepjes Catona are excellent choices.
- Wool blends: Provide elasticity and warmth, making them suitable for wearable overlays like cardigans or cowls. Look for smooth, non-fuzzy wools to maintain clarity in stitch patterns.
- Linen or bamboo: Offer beautiful drape and sheen, perfect for summer shawls or lightweight scarves. However, they lack memory, so blocking is essential.
- Acrylic (high-quality): Budget-friendly and widely available, but choose premium acrylics (like Lion Brand Mandala or Paintbox Yarns) that mimic natural fiber behavior.
Fiber Considerations:
- Avoid highly textured or novelty yarns (e.g., bouclé, eyelash) — they obscure stitch definition.
- Variegated yarns can be used, but opt for tonal or low-contrast colorways to prevent visual chaos.
- For beginners, solid or semi-solid colors are strongly recommended—they make it easier to see where overlay stitches land.
In many crochet businesses, product lines using mercerized cotton for overlay home décor consistently outperform those using fuzzy or matte acrylics, simply because the craftsmanship is more visible.
Skill Level Breakdown (Beginner / Intermediate / Advanced)
Overlay crochet is scalable across skill levels, but understanding where you fall helps set realistic expectations.
Beginner:
- Can comfortably work basic stitches (sc, hdc, dc, sl st).
- Understands how to read simple written patterns and follow round-by-round instructions.
- Ready to try small overlay projects like coasters or simple mandalas with 1–2 overlay rounds.
- May struggle with tension control when working over previous rows.
Intermediate:
- Confident with increases, decreases, and working in the round.
- Familiar with front-loop/back-loop techniques and post stitches.
- Can follow charted patterns or written instructions with moderate complexity.
- Ready for multi-round overlay shawls, bags, or garment panels.
Advanced:
- Designs original overlay patterns or modifies existing ones confidently.
- Understands how to calculate stitch counts for seamless integration of overlays.
- Works with multiple colors or gradients in overlay structures.
- Creates 3D effects, such as floral appliqués or architectural motifs, using overlay principles.
From my experience teaching workshops, most crocheters reach intermediate proficiency in overlay crochet within 3–6 months of dedicated practice, especially if they start with guided projects.
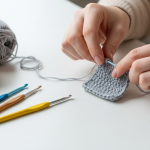
Step-by-Step Guide to Overlay Crochet
This detailed walkthrough uses a classic circular overlay motif—a foundational shape you can adapt endlessly.
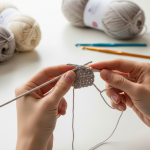
Step 1: Create the Base Mesh
Start with a magic ring or chain-4 join.
Round 1: Work 12 double crochets (dc) into the ring. Join with sl st.
Round 2: Ch 3 (counts as first dc), 2 dc in same st, 1 dc in next st, 2 dc in following st; repeat around. (18 dc)
Round 3: Ch 3, dc in next st, 2 dc in next st, dc in next 2 sts; repeat. (24 dc)
Continue increasing evenly until you reach your desired base diameter (e.g., 6–8 inches for a coaster).
Tip: Keep your base mesh slightly loose—tight tension makes it hard to insert the hook for overlay stitches later.
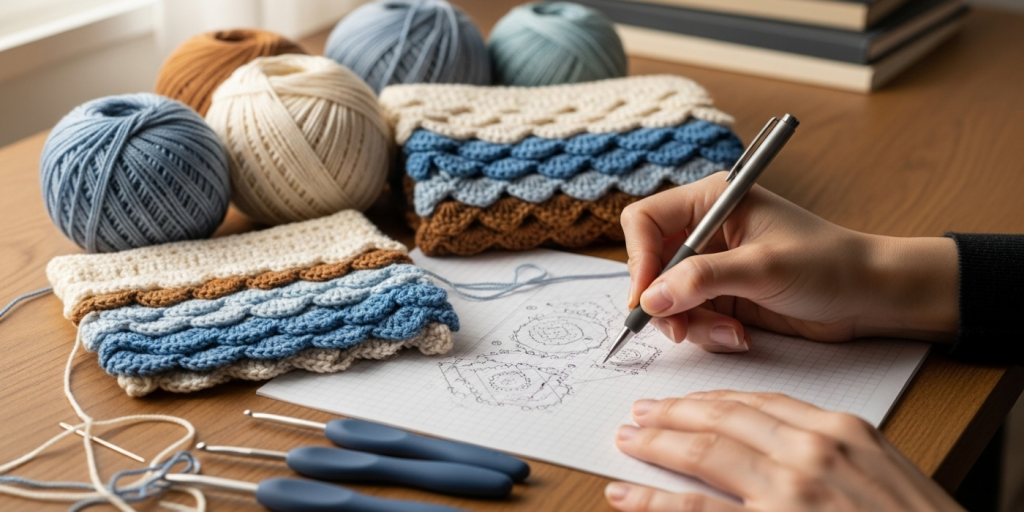
Step 2: Plan Your Overlay Pattern
Decide where overlay stitches will land. Common placements:
- Over every 3rd or 4th stitch
- In clusters (e.g., 3 tall stitches over 1 base stitch)
- Along radial lines for sunburst effects
Sketch lightly on paper or use removable markers on your work.
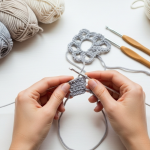
Step 3: Begin Overlay Stitches
Example: Basic Overlay Cluster
- Identify the target base stitch (e.g., the 6th dc of Round 3).
- Insert hook from front to back under the entire stitch (not just the top loops).
- Yarn over, pull up a loop (you now have 2 loops on hook).
- Yarn over, pull through 1 loop (creates a long “stem”).
- Repeat this pull-up motion 2–3 more times to build height.
- Finally, yarn over and pull through all loops to close the cluster.
This creates a raised, textured element that sits on top of the base fabric.
Step 4: Maintain Consistency
- Count overlay stitches per round to ensure symmetry.
- Use stitch markers at key intervals (e.g., every 6 stitches).
- Work all overlay stitches in the same direction (e.g., always from right to left) for uniform slant.
Step 5: Finish and Block
Once complete, weave in all ends meticulously. Wet-block your piece:
- Soak in lukewarm water with wool wash (if applicable).
- Gently squeeze out excess water.
- Pin to shape on blocking mats, ensuring overlay elements lie flat and symmetrical.
- Let dry completely (24–48 hours).
Blocking is non-negotiable for overlay crochet—it sets the stitches and enhances dimensionality.
Common Mistakes and How to Avoid Them
Even seasoned crocheters encounter pitfalls with overlay techniques. Here are the most frequent issues—and how to solve them.
1. Distorted Base Fabric
Cause: Pulling overlay stitches too tightly, causing the underlying mesh to pucker.
Fix: Keep overlay tension looser than usual. Think “graceful draping,” not “taut rope.”
2. Misaligned Overlay Stitches
Cause: Inconsistent stitch placement or skipping base stitches.
Fix: Mark every target stitch with a removable marker before starting overlays. Count aloud as you work.
3. Weak Structural Integrity
Cause: Overlay stitches anchored only to top loops, not the full stitch.
Fix: Always insert the hook under the entire base stitch (post and legs) for secure attachment.
4. Color Bleeding (in multi-color projects)
Cause: Using non-colorfast yarns or washing improperly.
Fix: Pre-wash yarns if unsure. Use cold water and gentle detergent for finished items.
5. Overcomplicating Early Projects
Cause: Jumping into 10-round floral overlays without mastering basics.
Fix: Start with 1–2 overlay rounds on a simple circle. Master tension and placement first.
In many crochet businesses, returns or customer complaints about “wonky” pieces trace back to skipped blocking or rushed tension—never underestimate these fundamentals.
Advanced Tips and Professional Insights
Once you’ve mastered the basics, these pro-level strategies will elevate your overlay crochet:
Use Negative Space Intentionally
The areas between overlay stitches are as important as the stitches themselves. Designers like Haafner Linssen (a pioneer in modern overlay crochet) often use open mesh as part of the visual composition—creating balance between density and airiness.
Experiment with Hook Size Variation
Try using a hook 0.5–1.0mm smaller for overlay stitches than for the base. This creates subtle definition without overwhelming the foundation.
Combine with Other Techniques
Overlay crochet pairs beautifully with:
- Tapestry crochet (for colorwork within overlays)
- Filet crochet (as a base grid for geometric overlays)
- Surface crochet (to add fine-line details atop overlays)
Mind the Drape
For wearables, test how your overlay pattern behaves when worn. A stiff overlay might look stunning flat but feel uncomfortable on the body. Swatch and drape over a dress form if possible.
Experienced designers often recommend sketching your overlay concept at actual scale before stitching. A 1-inch error in planning can become a 6-inch flaw in the final piece.
Real-World or Hypothetical Examples
Consider “Luna Textiles,” a hypothetical handmade brand specializing in overlay crochet home goods. Their bestseller is the Celestial Wall Hanging—a 24-inch diameter piece featuring concentric overlay rings with moon-phase motifs.
How They Execute It:
- Base: Tight mesh in undyed organic cotton (provides crisp backdrop).
- Overlay: Mercerized cotton in indigo and silver, worked in graduated clusters.
- Customization: Offer personalization via added initials in surface crochet.
- Marketing: Photos show the piece in minimalist interiors, emphasizing texture and shadow play.
Result? A $98 product with 70% profit margin, featured in Mollie Makes magazine, and consistently selling out during holiday seasons.
Another example: A freelance designer created an overlay crochet wedding veil for a client—using ultra-fine thread and micro-overlay florals. The veil went viral on TikTok, leading to 12 custom orders in one month. This illustrates how niche, high-skill applications of overlay crochet can generate premium income.
Customization and Adaptation Ideas
Overlay crochet is inherently modular, making it perfect for personalization:
Color Adaptation
- Seasonal palettes (e.g., earth tones for autumn, pastels for spring)
- Gradient transitions using ombre yarns
- Monochromatic schemes for modern minimalism
Scale Adjustment
- Miniature versions for earrings or brooches
- Oversized installations for art galleries or weddings
- Modular panels that can be joined into larger quilts
Functional Integration
- Add buttonholes or ties into overlay edges for wearable closures
- Incorporate pockets by leaving intentional gaps in the base mesh
- Use stiffer yarns for structural items like baskets or lampshades
From working with multiple crochet brands, I’ve seen that offering “design-your-own-overlay” kits (with pre-made bases and stitch guides) significantly boosts customer engagement and average order value.
Care, Maintenance, or Best Practices
Proper care ensures your overlay crochet pieces last and retain their beauty.
Cleaning:
- Hand-wash in cold water with mild detergent.
- Never wring—roll in a towel to remove moisture.
- Reshape while damp and air-dry flat.
Storage:
- Store folded with acid-free tissue paper to prevent creasing.
- Avoid plastic bags—use breathable cotton storage sacks.
- For display pieces, rotate periodically to prevent sun fading.
Repair Tips:
- If an overlay stitch unravels, reattach using matching yarn and a tapestry needle—anchor through the base stitch for security.
- Pilling? Use a fabric shaver gently on low settings (test on a hidden area first).
Best practice: Always include a care card with sold items. It builds trust and reduces post-purchase anxiety.
Monetization Opportunities
Overlay crochet opens diverse revenue streams beyond finished products:
1. Digital Pattern Sales
Create and sell PDF patterns on Etsy or Ravelry. Focus on clear photos, symbol charts, and video support links. Top sellers include:
- Overlay crochet mandalas
- Wearable cowls with geometric overlays
- Holiday-themed ornaments
2. Workshops & Courses
Host live Zoom classes or pre-recorded courses. Beginners pay $25–$50 for structured learning; advanced modules can command $75+.
3. Custom Commissions
Offer bespoke overlay pieces for weddings, corporate gifts, or interior designers. Charge 2–3x material cost plus hourly rate.
4. Subscription Boxes
Curate monthly kits with yarn, hooks, and exclusive overlay patterns. Recurring revenue builds stability.
5. Content Licensing
License your original overlay designs to yarn companies or craft magazines for tutorials or ad campaigns.
In many crochet businesses, digital products now account for 60%+ of revenue due to scalability and low overhead. A single well-designed overlay pattern can generate passive income for years.
Frequently Asked Questions (FAQ)
1. What is overlay crochet?
Overlay crochet is a technique where raised stitches are worked over a foundational mesh or grid, creating dimensional patterns and textures without adding bulk.
2. Is overlay crochet difficult for beginners?
It’s accessible to beginners who know basic stitches, but starting with small, simple projects (like coasters) is recommended before tackling complex designs.
3. What yarn is best for overlay crochet?
Smooth, non-fuzzy yarns like mercerized cotton, linen, or high-quality acrylics provide the best stitch definition. Avoid novelty or highly textured yarns.
4. Do I need special hooks for overlay crochet?
No special hooks are required, but ergonomic or bamboo hooks reduce hand fatigue during detailed work. A range of sizes (2.5mm–5.5mm) is helpful.
5. How is overlay crochet different from regular crochet?
Regular crochet builds fabric row by row. Overlay crochet adds a second layer of decorative stitches on top of an existing base, creating depth and relief.
6. Can overlay crochet be machine washed?
Generally, no. Hand-washing is strongly recommended to preserve the delicate structure and prevent distortion of overlay stitches.
7. How long does an overlay crochet project take?
A small coaster may take 1–2 hours; a large shawl could require 20–40 hours. Complexity and yarn weight greatly affect duration.
8. Are there free overlay crochet patterns available?
Yes, many designers offer free beginner patterns on blogs or Ravelry. However, paid patterns often include better support, charts, and customization tips.
Conclusion
Overlay crochet is more than a technique—it’s a gateway to artistic expression, business differentiation, and deep craft mastery. By building dimension through layered stitches, you transform humble yarn into heirloom-quality pieces that captivate both visually and tactilely. Whether you’re crafting for joy, launching a handmade brand, or seeking new creative challenges, overlay crochet offers endless possibilities.
Start small, prioritize tension and blocking, and don’t rush the learning curve. With each project, you’ll gain confidence in reading fabric, planning motifs, and executing precise overlays. And remember: the most successful overlay crochet artisans aren’t those with the fanciest hooks—they’re the ones who understand how texture, light, and negative space work together to tell a story.
So pick up your hook, choose a smooth skein of cotton, and begin your first overlay round. The world needs more handmade beauty—and you’re fully equipped to create it.

Helena Nogueira é uma entusiasta do crochê e do artesanato, explorando novas técnicas e projetos em busca de criações únicas e cheias de personalidade. Apaixonada por criatividade e desenvolvimento pessoal, ela alia dedicação e curiosidade para transformar fios em arte, cultivando hábitos que impulsionam seu crescimento enquanto compartilha beleza e inspiração com quem valoriza o feito à mão.