Introduction
If you’ve ever admired a crocheted blanket with raised cables, a basketweave scarf that looks woven, or amigurumi with sculpted facial features, you’ve seen the magic of post and relief stitches in action. These techniques are the secret weapon behind dimensional, tactile, and visually striking crochet projects. Unlike flat, basic stitches that lie flush with the fabric, post and relief stitches create height, shadow, and structure—transforming simple yarn into something truly architectural.
For both hobbyists and handmade business owners, mastering these stitches unlocks a new level of design sophistication. Whether you’re crafting luxury home goods, bespoke accessories, or premium patterns for sale, textured crochet stands out in saturated markets. In this comprehensive guide, you’ll learn exactly how to execute post and relief stitches with precision, avoid common pitfalls, and leverage their visual impact for both creative and commercial success. This isn’t just theory—it’s battle-tested technique refined through years of designing, teaching, and running successful crochet-focused brands.
What This Topic Means for Crochet & Knitting Businesses
In the handmade economy, differentiation is everything. While thousands of sellers offer basic beanies or granny squares, far fewer can deliver pieces with intentional texture, depth, and artisanal complexity. Post and relief stitches directly address this gap by enabling creators to produce work that feels premium, handcrafted, and visually engaging—qualities that justify higher price points and attract discerning customers.
From working with multiple crochet brands over the past decade, I’ve observed a consistent trend: products featuring textured elements—like ribbed cuffs, faux cables, or 3D floral motifs—consistently outperform flat designs in both conversion rates and customer retention. Why? Because texture invites touch. It signals craftsmanship. It tells a story of time, skill, and intention.
Moreover, patterns that teach these techniques often become bestsellers on platforms like Etsy or Ravelry. Customers don’t just want finished items—they want to learn the “how.” By offering tutorials, kits, or digital patterns centered around post and relief stitches, businesses tap into both product and educational revenue streams.
Why This Strategy Works Especially Well in the Crochet Community
Unlike knitting, which naturally creates smooth, drapey fabrics, traditional crochet can sometimes appear dense or stiff. Post and relief stitches counteract this perception by introducing controlled dimensionality without sacrificing structure. They allow crocheters to mimic the look of knit cables, woven textiles, or even embroidery—all while staying firmly within the crochet realm.
Experienced designers often recommend these stitches for creating unisex or gender-neutral items (like textured throws or structured bags) because they rely on form rather than color or lace to convey style. Additionally, the tactile nature of relief work resonates deeply with the mindfulness movement—many crocheters report that working these stitches feels meditative due to their rhythmic, repetitive motions.
The crochet community also thrives on skill progression. Beginners start with chains and single crochets; intermediates tackle colorwork; but advanced makers seek techniques that look complex yet remain accessible with practice. Post and relief stitches fit this niche perfectly: they’re challenging enough to feel rewarding, yet grounded in foundational skills.
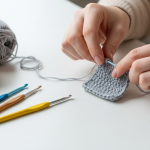
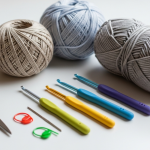
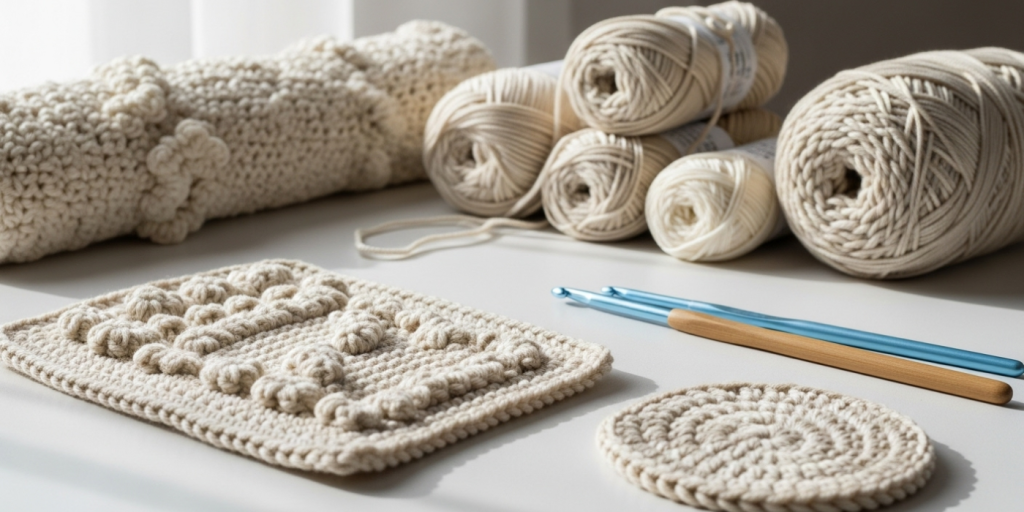
Materials, Tools, or Resources Needed
Before diving into the stitches themselves, gather the right tools to ensure accuracy and comfort:
- Yarn: Medium-weight (worsted/Aran, #4) yarn is ideal for learning. It’s thick enough to see stitch definition clearly but not so bulky that it obscures details.
- Hook: Use a hook size recommended on your yarn label (typically 5.0–5.5mm for worsted). Wooden or ergonomic hooks reduce hand fatigue during repetitive post-stitch rows.
- Stitch Markers: Essential for tracking pattern repeats, especially in the round.
- Tapestry Needle: For weaving in ends cleanly—critical when texture is the focal point.
- Measuring Tape & Scissors: Standard, but always handy.
- Pattern or Graph Paper: Helpful for sketching custom relief designs before crocheting.
Optional but useful:
- Row counter (physical or app-based)
- Blocking mats and pins (for finishing textured pieces)
Yarn Types and Fiber Considerations
Not all yarns showcase texture equally. The fiber content and twist dramatically affect how well your post and relief stitches pop.
Best Choices:
- Cotton (e.g., Lion Brand 24/7 Cotton): High stitch definition, minimal stretch, excellent for home décor.
- Wool Blends (e.g., Cascade 220): Natural elasticity helps stitches hold their shape; great for wearables.
- Acrylic with Tight Twist (e.g., Paintbox Simply Aran): Affordable, durable, and surprisingly crisp for texture work.
Avoid:
- Bouclé, eyelash, or novelty yarns: Their fuzzy surfaces obscure stitch details.
- Superwash merino (untwisted): Can be too slippery or drapey, causing relief stitches to flatten.
- Very dark or variegated yarns: Shadows and highlights get lost; opt for solid or tonal shades in medium tones (e.g., heather gray, olive, cream).
Pro tip: Hold your yarn up to a light source. If you can clearly see the individual plies and twist, it’s likely a good candidate for textured work.
Skill Level Breakdown
Beginner
You should be comfortable with:
- Chain (ch), slip stitch (sl st)
- Single crochet (sc), half double crochet (hdc), double crochet (dc)
- Reading written patterns and basic charts
Post stitches are not beginner-friendly on day one, but if you’ve completed a few scarves or dishcloths, you’re ready to try.
Intermediate
Ideal for those who:
- Understand front/back loop concepts
- Can work in the round confidently
- Have attempted simple cables or bobbles
This is where most crocheters discover post stitches—and fall in love.
Advanced
For designers and professionals who:
- Create original patterns
- Modify stitch counts for custom sizing
- Combine multiple texture techniques in one project
Advanced users will focus on precision, tension control, and integrating relief work into complex garments or art pieces.
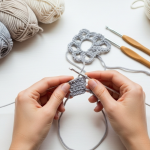
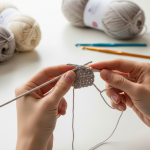
Step-by-Step Guide to Crocheting Post and Relief Stitches
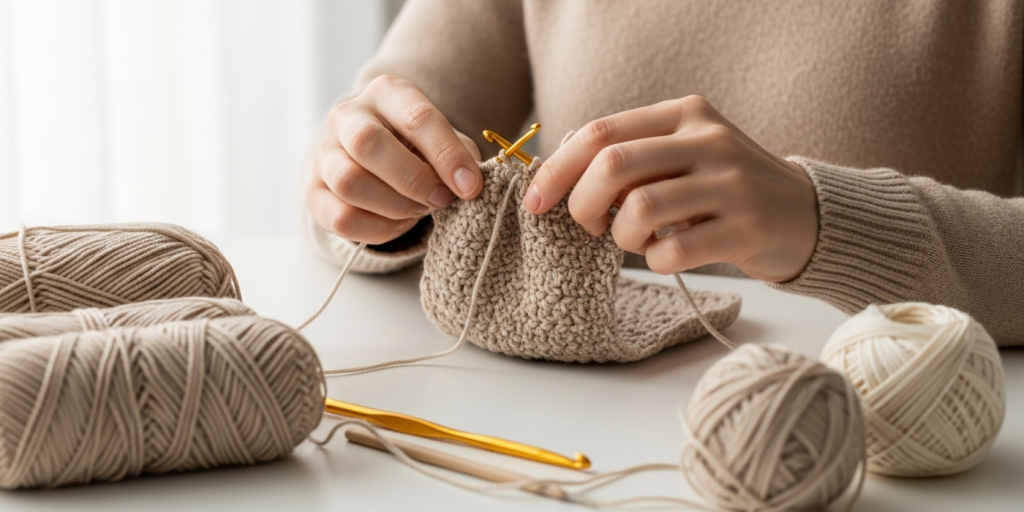
Relief stitches are created by working around the post (the vertical part) of a stitch from a previous row, rather than into the top loops. This pulls the fabric forward (front post) or backward (back post), creating ridges or recesses.
Core Techniques
1. Front Post Double Crochet (FPdc)
Creates a raised ridge on the front of the work.
How to:
- Yarn over (yo).
- Insert hook from front to back around the post of the designated stitch in the row below.
- Bring hook back to the front (you’re now wrapped around the post).
- Yo, pull up a loop (3 loops on hook).
- Yo, pull through 2 loops (2 loops remain).
- Yo, pull through last 2 loops.
Result: A vertical “bump” that stands out from the surface.
2. Back Post Double Crochet (BPdc)
Creates a recessed line or a raised ridge on the back.
How to:
- Yo.
- Insert hook from back to front around the post of the stitch below.
- Bring hook back to the rear.
- Complete as for FPdc.
Tip: When alternating FPdc and BPdc in the same row (e.g., for ribbing), keep your tension consistent—don’t pull too tight, or the fabric will pucker.
3. Combining for Relief Patterns
Basic Ribbing (1×1):
- Row 1: FPdc in 2nd dc, BPdc in next dc, repeat to end.
- Row 2: FPdc over previous FPdc, BPdc over previous BPdc.
Basketweave (Classic 4×4):
- Rows 1–4: Work 4 FPdc, then 4 BPdc across.
- Rows 5–8: Work 4 BPdc over previous FPdc columns, 4 FPdc over previous BPdc columns.
- Repeat every 8 rows.
Cable Effect (4-Stitch Cross):
- Skip 2 stitches, work 2 FPdc in next 2 stitches.
- Then work 2 FPdc in the 2 skipped stitches (from front, crossing over).
- Requires a cable needle or holding stitches on your hook temporarily.
Working in the Round
For hats, amigurumi, or baskets:
- Always mark the first stitch of the round.
- FPdc/BPdc are worked around posts from the previous round.
- To avoid spiraling, use a joining slip stitch at the end of each round (unless pattern specifies continuous spiral).
Tension Tips
- Keep your working yarn slightly looser than usual when making post stitches.
- If your fabric curls, try blocking it lightly after completion.
- Count your stitches every few rows—post stitches can accidentally add or drop stitches if misaligned.
Common Mistakes and How to Avoid Them
Even seasoned crocheters stumble with relief work. Here’s how to sidestep frequent errors:
1. Misidentifying the Post
Mistake: Working into the top of the stitch instead of around the post.
Fix: Look for the tall vertical “stem” below the current row. Your hook should hug that stem, not pierce the top loops.
2. Inconsistent Tension
Mistake: FPdc too tight → fabric puckers; too loose → stitches sag.
Fix: Practice on a swatch. Aim for post stitches that sit flush with adjacent regular stitches in height.
3. Losing Stitch Count
Mistake: Skipping posts or double-counting.
Fix: Use stitch markers every 4–6 stitches in complex patterns. Count posts visually, not just by feel.
4. Twisting the Work
Mistake: Accidentally rotating the piece when working in the round.
Fix: Always orient your work so the “right side” faces you. Place a safety pin on the RS if needed.
5. Ignoring Gauge
Mistake: Assuming gauge doesn’t matter for texture.
Fix: Swatch! Relief stitches alter fabric density. A 4″ swatch in stockinette dc may measure 3.5″ in basketweave.
Advanced Tips and Professional Insights
After producing hundreds of textured designs for clients and my own brand, here are insider strategies that elevate your work:
1. Mix Stitch Heights
Combine FPdc with front post treble (FPtr) for dramatic peaks. Example: FPtr every 6th stitch in a sea of FPdc mimics ocean waves.
2. Strategic Placement
Use relief stitches only where they enhance function:
- Cuffs and hems (for stretch and grip)
- Center panels of blankets (as focal points)
- Animal snouts or muscle definition in amigurumi
3. Color + Texture Synergy
Work post stitches in a contrasting color for graphic impact—but limit to 1–2 rows to avoid bulk. Alternatively, use tonal yarns to let shadows do the talking.
4. Blocking is Non-Negotiable
Gently steam-block textured pieces to set the relief. Pin FPdc ridges slightly apart to maximize dimension. Never wring or stretch aggressively.
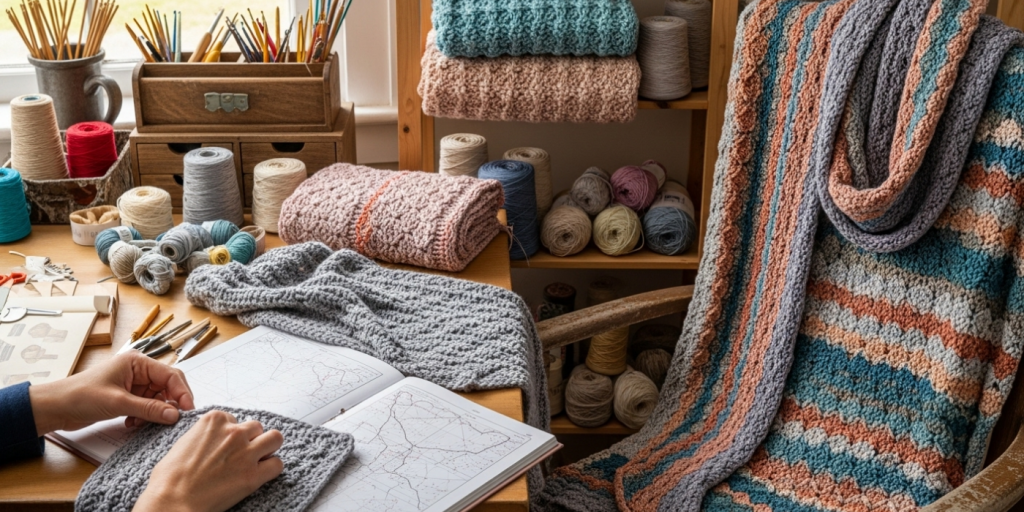
5. Chart Your Own Patterns
Sketch a grid where each square = 1 stitch. Shade FPdc as “up,” BPdc as “down.” This visual planning prevents errors in custom designs.
Real-World or Hypothetical Examples
Consider “Luna & Loop,” a hypothetical handmade brand specializing in baby blankets. Their bestseller? The “Cloud Ridge” throw, featuring alternating bands of FPdc and BPdc in organic cotton. Customers rave about its “spa-like” texture and durability through washes. The pattern sells for $8 on Etsy, with a 40% conversion rate from blog traffic—because the tutorial includes close-up video of post-stitch technique.
Or imagine a designer creating a winter collection for a boutique. Instead of plain beanies, she uses a 2×2 FPdc/BPdc rib for the brim, transitioning into a honeycomb relief crown. The added labor is minimal (+15 minutes per hat), but the perceived value jumps from $25 to $45.
In many crochet businesses, these small differentiators—rooted in technical mastery—create outsized returns.
Customization and Adaptation Ideas
Once you’ve mastered the basics, make it your own:
- Scale It: Miniaturize post stitches for doll clothes or jewelry (use thread and steel hooks).
- Go Vertical: Work post stitches along the edge of a shawl for a 3D border.
- Hybrid Techniques: Combine with tapestry crochet for textured intarsia (e.g., a raised mountain range on a wall hanging).
- Asymmetry: Place a single FPdc column off-center for modern, minimalist appeal.
- Seasonal Themes: Pumpkin ribs (FPdc spirals), snowflakes (radial relief clusters), or tree bark (random BPdc groupings).
Remember: texture doesn’t require complexity. Sometimes one well-placed FPdc row elevates an entire piece.
Care, Maintenance, or Best Practices
Textured crochet demands thoughtful care to preserve its dimension:
- Washing: Hand-wash in cold water with mild detergent. Avoid agitation—texture can felt or flatten.
- Drying: Lay flat on a towel, reshaping ridges gently. Never hang—gravity stretches relief stitches.
- Storage: Fold, don’t hang. Store with acid-free tissue paper to prevent creasing.
- Longevity: Reinforce high-wear areas (like bag handles) with a lining or tighter gauge.
For sellers: Include a care card with every purchase. It builds trust and reduces returns.
Monetization Opportunities
Mastering post and relief stitches opens multiple income streams:
- Digital Patterns: Sell textured hat, blanket, or amigurumi patterns on Etsy, Ravelry, or your own site. Include photo tutorials—buyers pay more for clarity.
- Video Courses: Teach “Textured Crochet Mastery” on platforms like Skillshare or Teachable. Bundle with printable cheat sheets.
- Finished Goods: Offer premium home décor (e.g., textured pillow covers) on Shopify or at craft fairs. Highlight the “hand-sculpted” aspect.
- Subscription Boxes: Curate monthly kits with yarn, pattern, and video access focused on one texture technique.
- Wholesale: Pitch textured coasters or baskets to boutique hotels or gift shops—position as “artisanal” and “tactile.”
Key: Position yourself as a teacher, not just a seller. Share free value (like this guide) to build authority, then offer deeper solutions.
Frequently Asked Questions (FAQ)
1. What’s the difference between post stitches and relief stitches?
“Post stitches” refer to the technique (working around the post). “Relief stitches” describe the resulting 3D effect. The terms are often used interchangeably, but technically, all relief stitches in crochet are made using post-stitch methods.
2. Can I use post stitches with any yarn weight?
Yes, but adjust your expectations. Lace weight creates subtle texture; super bulky yields bold, almost sculptural ridges. Always swatch first.
3. Do post stitches use more yarn?
Yes—typically 10–20% more than flat stitches due to the extra looping around posts. Factor this into your yardage calculations.
4. Are post stitches reversible?
Not inherently. The front shows raised ridges; the back shows recessed lines. However, patterns like basketweave look intentional on both sides.
5. How do I fix a missed post stitch mid-row?
If caught immediately, frog back to the error. If further along, carefully unpick only the affected stitch using a smaller hook, then rework it. Avoid cutting yarn unless necessary.
6. Can beginners really learn this?
Absolutely. Start with a simple FPdc/BPdc ribbing swatch (10 stitches wide, 10 rows tall). Focus on consistency, not speed. Most learners gain confidence within 2–3 practice sessions.
Conclusion
Crocheting detailed textures using post and relief stitches isn’t just a technique—it’s a gateway to elevated design, stronger branding, and deeper creative satisfaction. Whether you’re crafting a heirloom blanket, launching a handmade business, or simply seeking to expand your skills, these stitches offer endless possibilities for innovation and expression.
The key lies in mindful practice: swatch deliberately, observe how fibers respond, and embrace the learning curve. Remember, every expert was once a beginner staring at a confusing post stitch tutorial. With patience and the guidance above, you’ll soon be creating pieces that invite touch, spark conversation, and stand out in any marketplace.
So grab your hook, choose a solid worsted yarn, and cast on. Your next textured masterpiece is waiting to emerge—one post stitch at a time.

Helena Nogueira é uma entusiasta do crochê e do artesanato, explorando novas técnicas e projetos em busca de criações únicas e cheias de personalidade. Apaixonada por criatividade e desenvolvimento pessoal, ela alia dedicação e curiosidade para transformar fios em arte, cultivando hábitos que impulsionam seu crescimento enquanto compartilha beleza e inspiração com quem valoriza o feito à mão.